Manage a Client Project with Agiflow and Claude Code
For freelancersWhen you finish, you will have one Agiflow project for a single client, its deliverables on the board as dated tasks, and Claude Code connected to your Agiflow workspace from your terminal, so you can add work, move a deliverable to Review, and draft a client status update without opening the board.
Before you start
An Agiflow account, signed in
Open /dashboard. The sidebar shows a workspace name and a Projects area.
Ability to generate an API key
Open "Connect AI tools" at the bottom of the left sidebar, pick Claude Code, switch Auth to API key. The Generate API key button is present and enabled. No admin role is required. A free-plan workspace allows at most 2 active API keys; if yours already has 2, revoke one first (see the troubleshooting note below).
Claude Code installed
Run claude --version in your terminal. It prints a version number.
A folder on disk for this client
Run pwd inside it. It prints the folder path.
One real client, three deliverables
Each with a due date. This guide uses Acme Co as the worked example; substitute your own client and dates.
A terminal beside your browser
Both windows visible at once. Steps 5 through 10 alternate between them.
Nothing else is assumed: no existing project, no existing tasks, no template, and no paid plan.
The worked example
This guide uses one client throughout, so every command and prompt below is copy-pasteable as written. Substitute your own client, folder, and deliverables when you run it for real.
Client project
Acme Co Website Refresh
Client folder
~/clients/acme-co
Deliverables
- Design homepage mockup, due 2 September 2026
- Build the contact form, due 5 September 2026
- Write the About page copy, due 8 September 2026
Create the project for one client and open its board
In the left sidebar, click Create Project (from the dashboard you can also click + New project). Leave Blank Project selected, which is the default.
Type into the field labelled Project Name: Acme Co Website Refresh
Type into the field labelled Description (optional): Client site refresh. Three deliverables due in the first week of September.
Submit with Create Project.
You should see
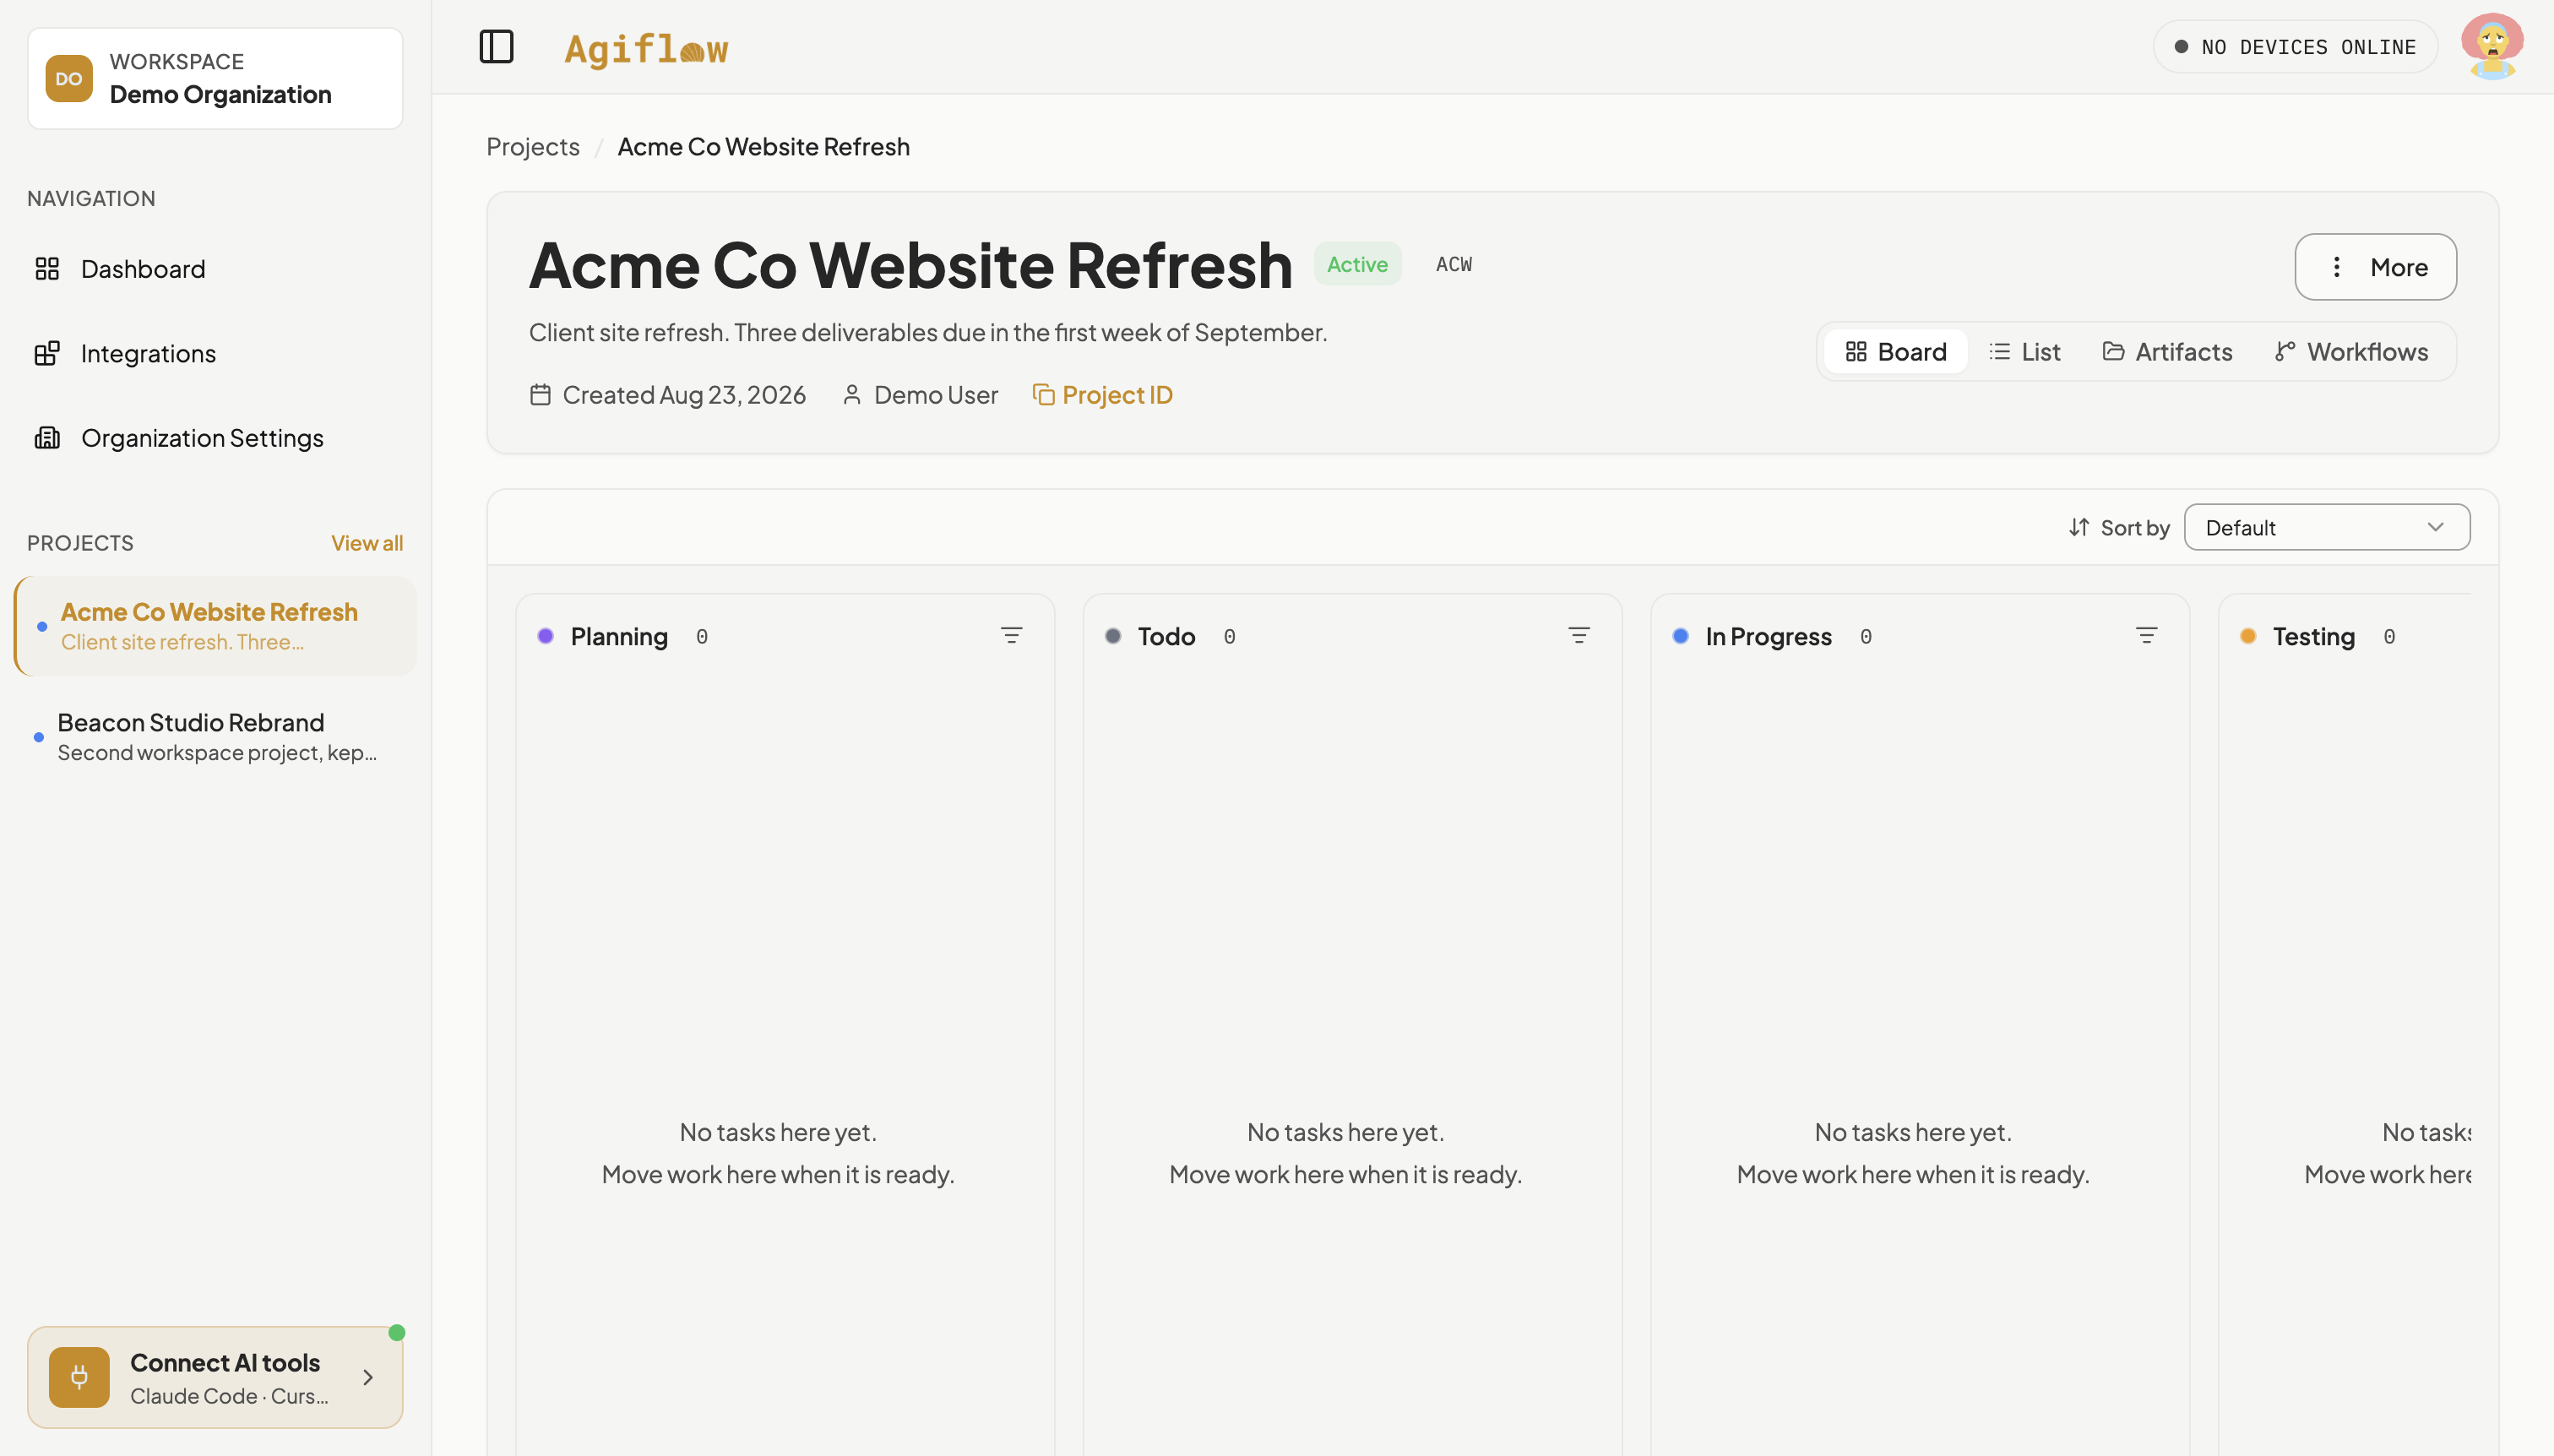
Submitting lands you directly on the new project’s board at /dashboard/projects/{projectId}, showing eight empty lanes: Planning, Todo, In Progress, Testing, Review, Done, Blocked, and Cancelled, with no tasks in any of them.
Open Connect AI tools and pick Claude Code
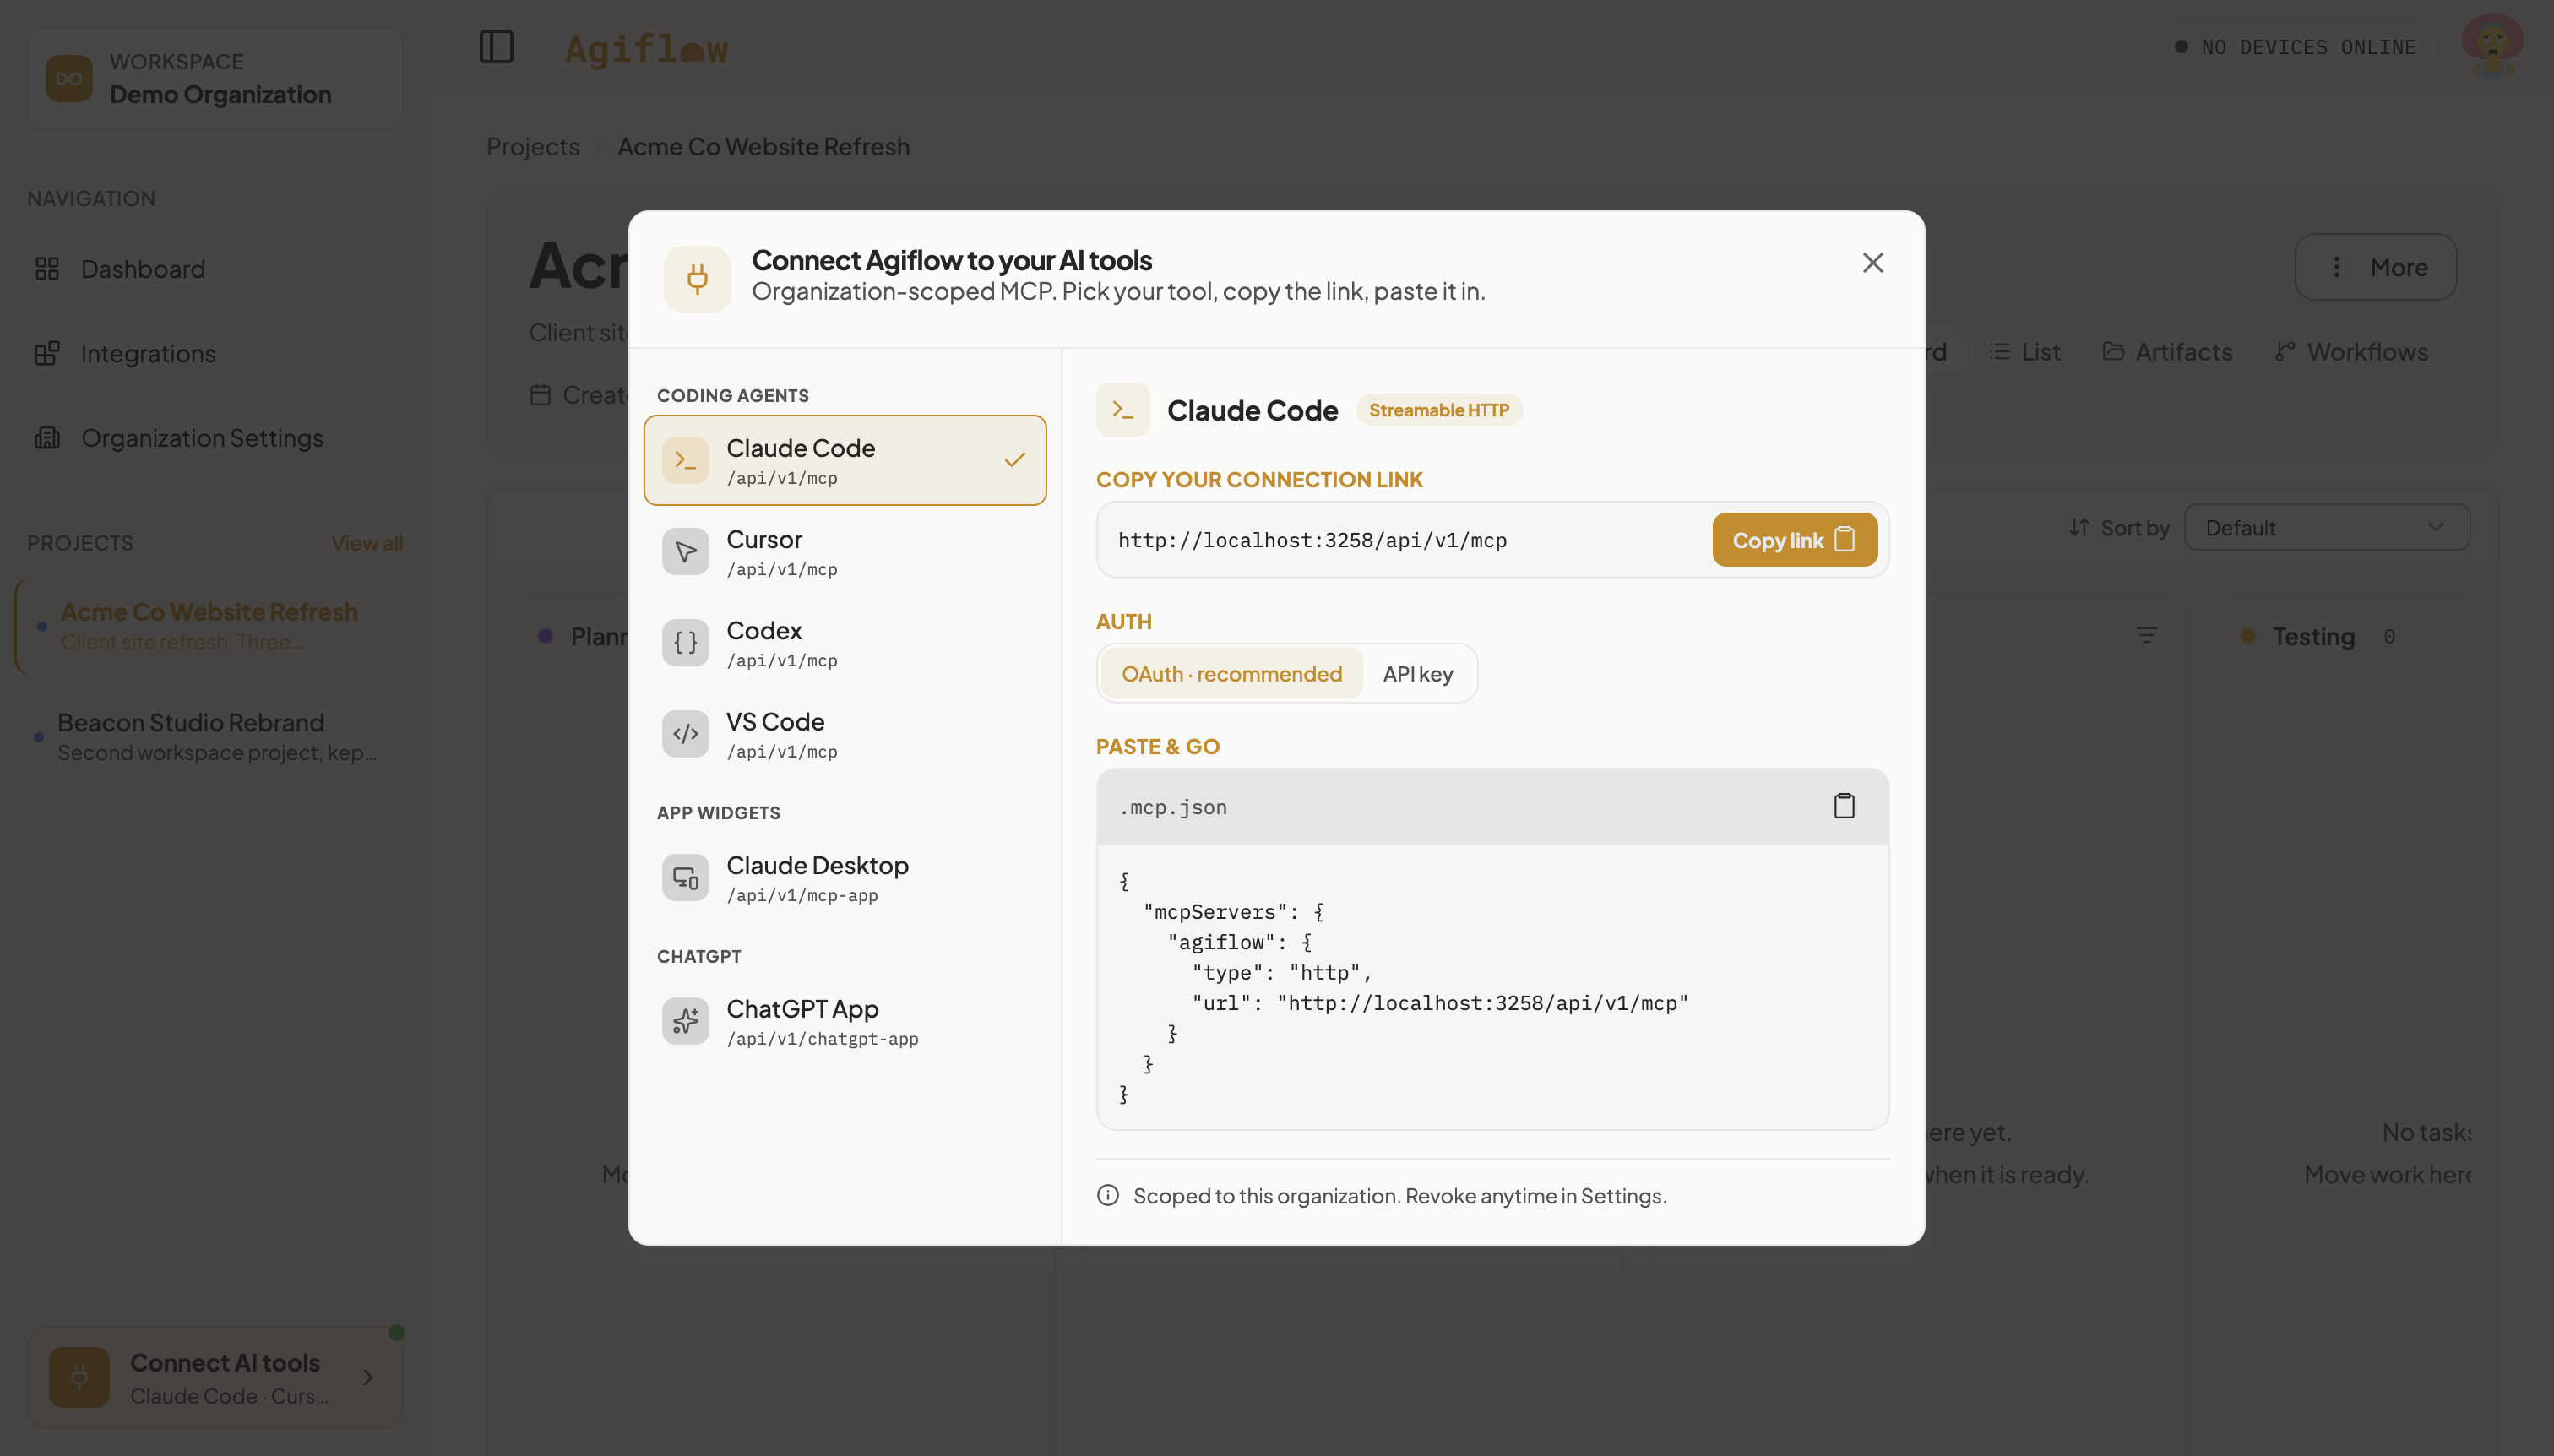
At the bottom of the left sidebar, below the Projects list, click Connect AI tools. The dialog Connect Agiflow to your AI tools opens with a tool list (Claude Code, Cursor, Codex, VS Code, Claude Desktop, ChatGPT App). Claude Code is selected by default; click it if it is not.
You should see
The dialog’s right pane shows Claude Code, a Copy your connection link field holding a URL, an Auth toggle, and a Paste & go block labelled .mcp.json. The footer reads “Scoped to this organization. Revoke anytime in Settings.”
Both auth methods below produce a connection scoped to your organization, not to this one project. That is why every prompt in this guide names the project explicitly, from step 6 onward.
Generate an API key and copy the connection config
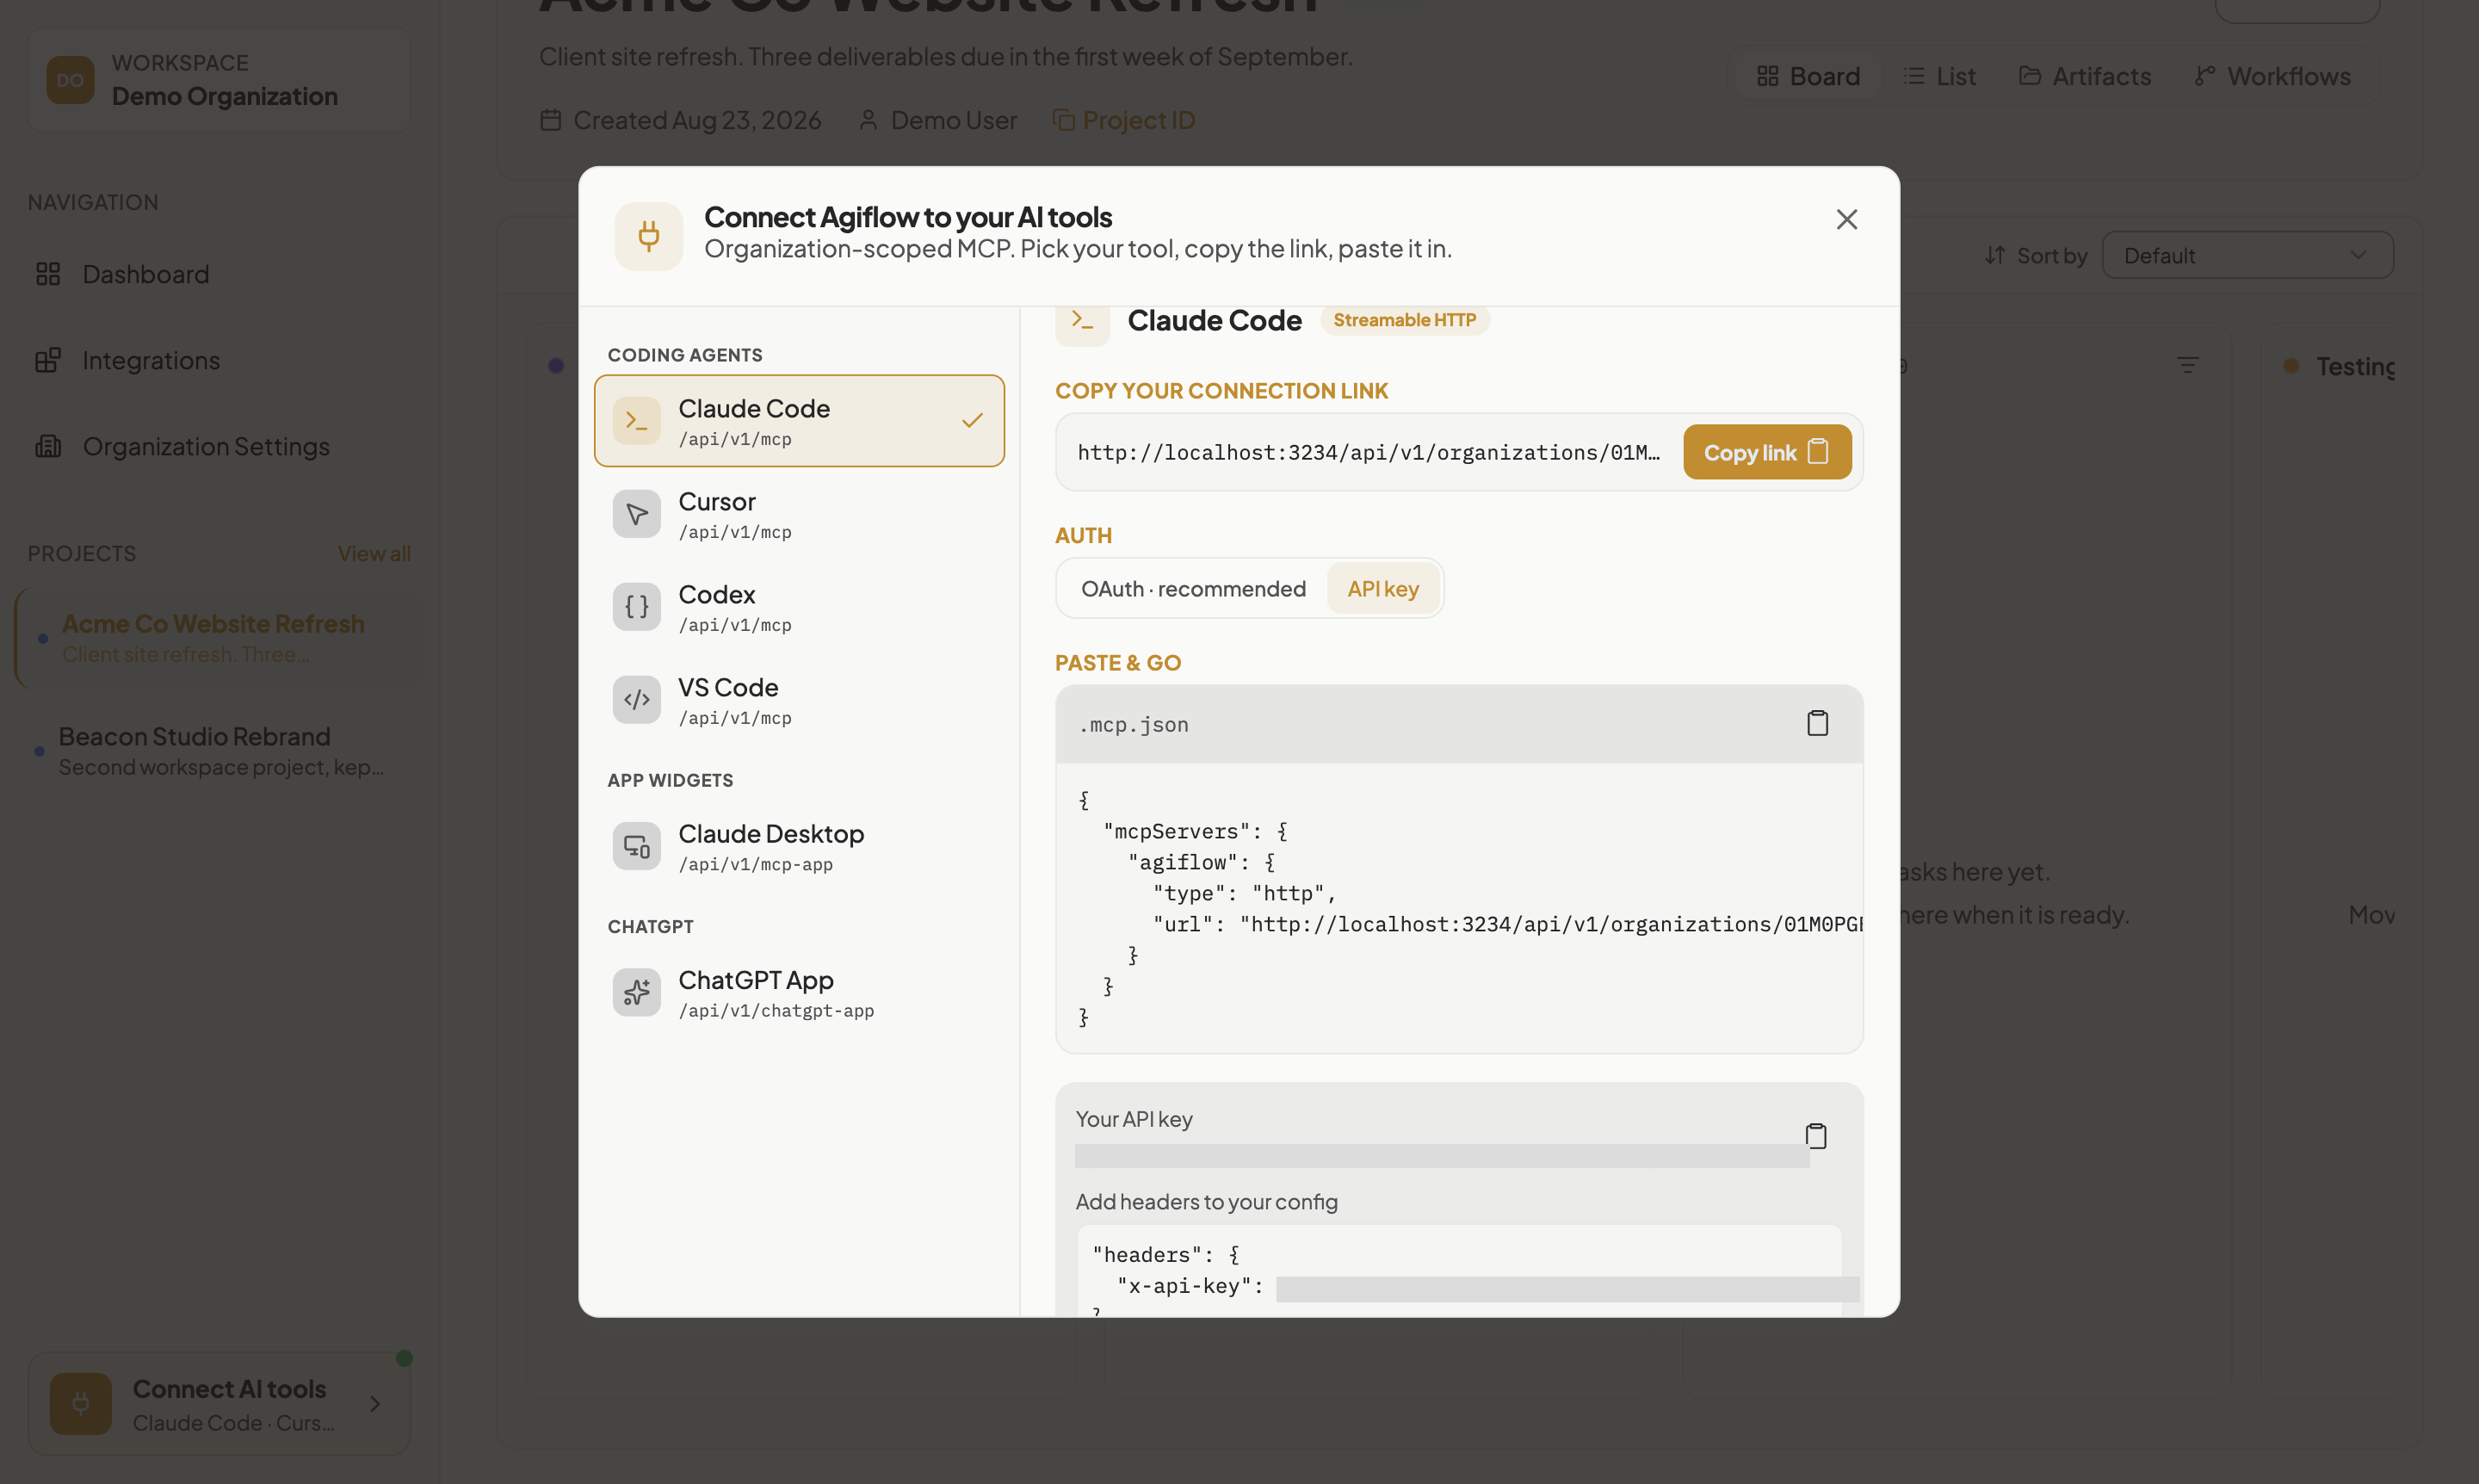
In the Auth toggle, click API key (the other option is OAuth · recommended and is selected by default). Click Generate API key. Copy the .mcp.json block from Paste & go, then copy the headers block, then copy the key itself.
The product labels OAuth “recommended.” Both methods reach the same scope, your whole workspace; this guide uses API key because it is a single copy and paste that does not need a browser sign-in handshake. If you would rather use OAuth, see connecting AI tools.
You should see
The dialog shows Your API key with a copy control, and Add headers to your config with an x-api-key header block. The connection link now reads {your API origin}/api/v1/organizations/{your workspace id}/mcp.
Copy it now. Navigating away before you save it means generating a new one.
Save the configuration in the client folder
Write the copied blocks to .mcp.json in the client folder, merging the headers block into the same server entry, then verify it.
mkdir -p ~/clients/acme-co
cd ~/clients/acme-co
Verify the file
$ cat .mcp.json
{
  "mcpServers": {
    "agiflow": {
      "type": "http",
      "url": "https://your-api-origin/api/v1/organizations/YOUR_WORKSPACE_ID/mcp",
      "headers": {
        "x-api-key": "YOUR_API_KEY"
      }
    }
  }
}
You should see
cat .mcp.json prints the JSON you saved, including the organizations URL and the x-api-key header.
.mcp.json has to sit in the folder Claude Code is started from, or it will never read it.
Start Claude Code and confirm the connection
Start Claude Code in the client folder, then check its server list. On first start in a folder Claude Code has not seen before, it asks “Do you trust the files in this folder?”; choose Yes, I trust this folder.
claudeSend this
/mcp
/mcp output
  Manage MCP servers
  4 servers

    Project MCPs (~/clients/acme-co/.mcp.json)
  > agiflow · ✔ connected · 35 tools

    User MCPs (~/.claude.json)
    ...
You should see
/mcp lists a project MCP server named agiflow as connected, with a tool count.
Confirm what the assistant can see
Before asking Claude Code to change anything, ask it what it is connected to. Seeing every project in your workspace here is the expected result, not a fault to fix; it is the reason the prompts from here on name the project.
Send this
Tell me which Agiflow workspace you are connected to, what your connection is scoped to, and list the projects and tasks you can see.
Claude Code's reply (your workspace name and project list will differ)
⏺ Workspace

  Demo Organization

  Scope

  Organization scope — not pinned to a single project, work unit, or task. That means I can read
  and manage projects, work units, and tasks across the whole org, rather than being limited to
  one project's board.

  Projects (2)

  Acme Co Website Refresh — Client site refresh. Three deliverables due in the first week of
  September.
  Beacon Studio Rebrand — Second workspace project, kept only so the connect dialog demo shows
  more than one project.

  Tasks

  None yet. Both projects return 0 tasks.
You should see
The assistant names your workspace, says the connection is scoped to the whole organization rather than to a single project, and lists every project in your workspace, including Acme Co Website Refresh with no tasks yet.
After some replies, Claude Code may auto-fill a suggested next message as literal, editable text in the input box rather than a placeholder. If you see text already sitting there before you paste the next prompt below, type over it rather than trying to clear it with a shortcut.
Turn the deliverables into dated tasks
Have the assistant create the client’s deliverables on the board, naming the project.
Send this
Create these deliverables as tasks in the Agiflow project "Acme Co Website Refresh", with due dates: Design homepage mockup, due 2 September 2026. Build the contact form, due 5 September 2026. Write the About page copy, due 8 September 2026. Put every task in Todo and give each one a one-line acceptance criterion.
Claude Code's reply
⏺ All three tasks created in Acme Co Website Refresh, no errors:

  ┌───────┬───────────────────────────┬────────────┬────────┬────────────────────────────────────────────┐
  │  Key  │            Task           │    Due     │ Status │            Acceptance criterion            │
  ├───────┼───────────────────────────┼────────────┼────────┼────────────────────────────────────────────┤
  │ ACW-1 │ Design homepage mockup    │ 2 Sep 2026 │ Todo   │ A desktop and mobile homepage mockup is    │
  │       │                           │            │        │ delivered and signed off by the client.    │
  ├───────┼───────────────────────────┼────────────┼────────┼────────────────────────────────────────────┤
  │ ACW-2 │ Build the contact form    │ 5 Sep 2026 │ Todo   │ The contact form validates required fields │
  │       │                           │            │        │ and delivers a submission to the client's  │
  │       │                           │            │        │ inbox.                                     │
  ├───────┼───────────────────────────┼────────────┼────────┼────────────────────────────────────────────┤
  │ ACW-3 │ Write the About page copy │ 8 Sep 2026 │ Todo   │ Final About page copy is proofread and     │
  │       │                           │            │        │ approved by the client.                    │
  └───────┴───────────────────────────┴────────────┴────────┴────────────────────────────────────────────┘

  Due times are 12:00 UTC on each date, since Agiflow stores due dates as timestamps and you gave
  dates only. Each criterion is a single unchecked checklist item, as asked.
You should see
The assistant reports three created tasks with their keys, all in Todo, each with its due date and a one-line acceptance criterion it wrote.
Takes about 35 to 45 seconds, not blocking.
Due times default to 12:00 UTC, since you gave dates without times, and the acceptance criteria are the assistant’s own drafting, since the prompt did not supply a definition of done. Both are easy to adjust in a follow-up prompt.
Check the board and open one deliverable
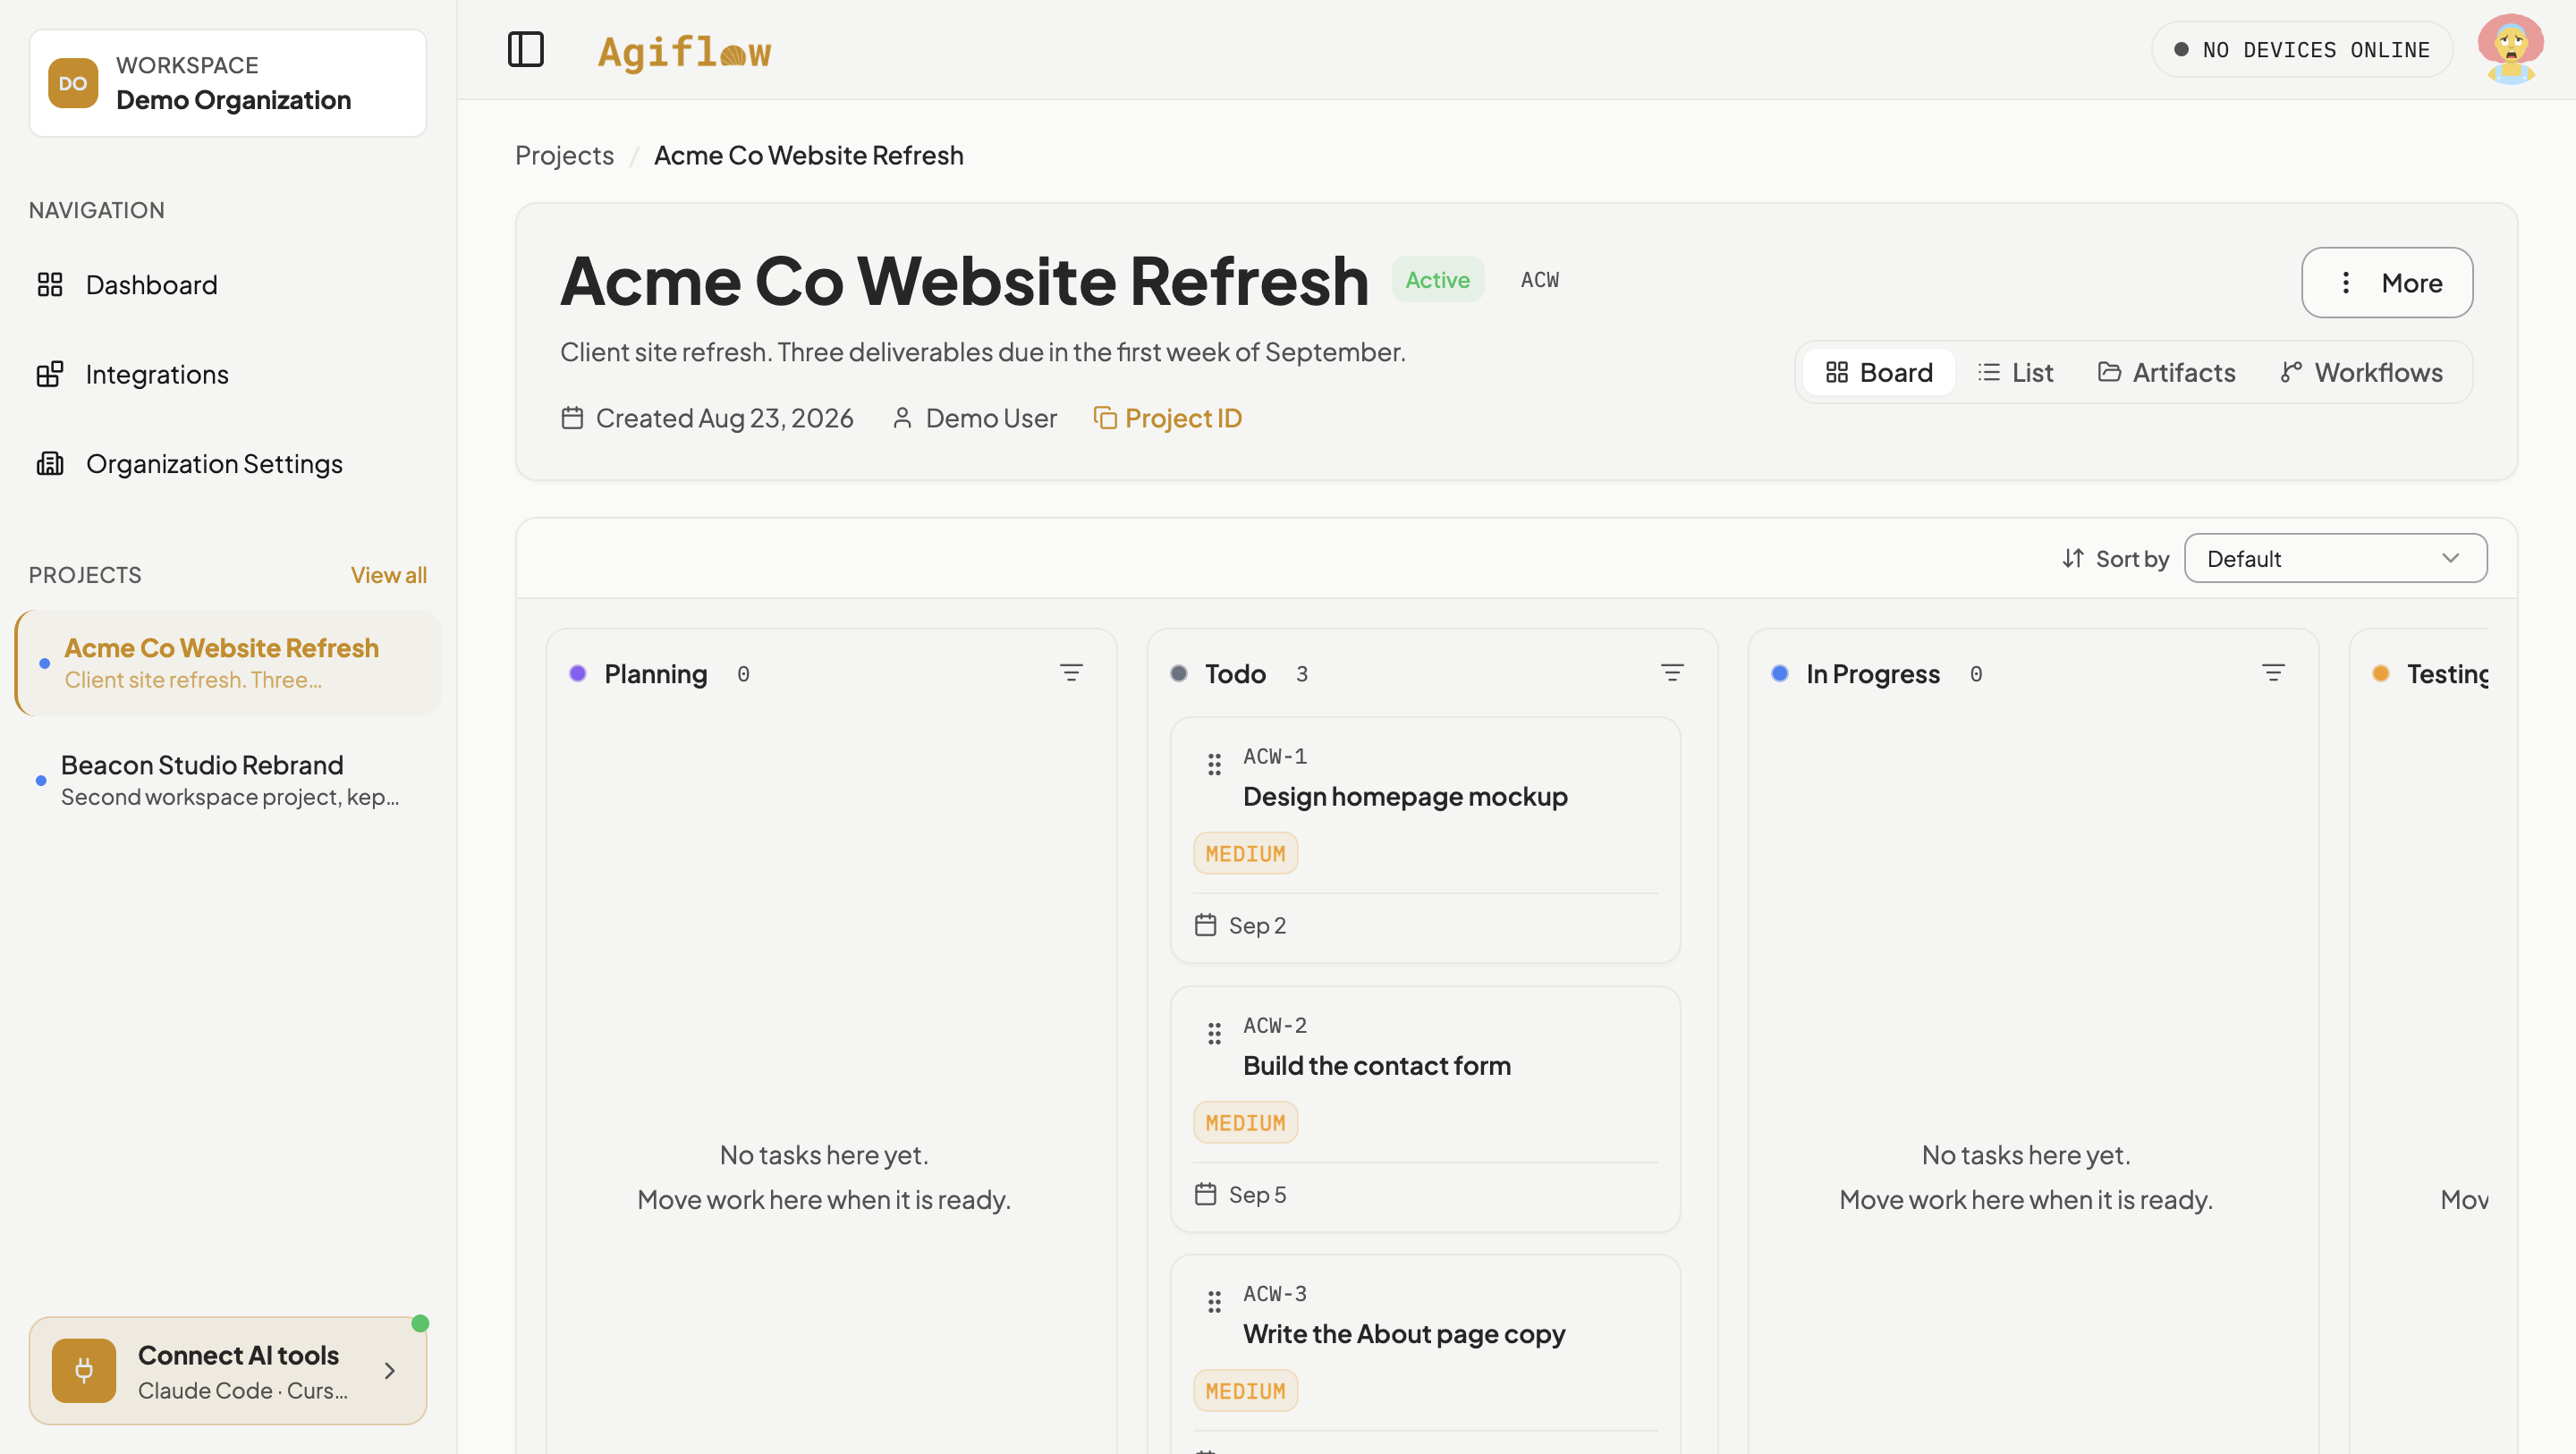
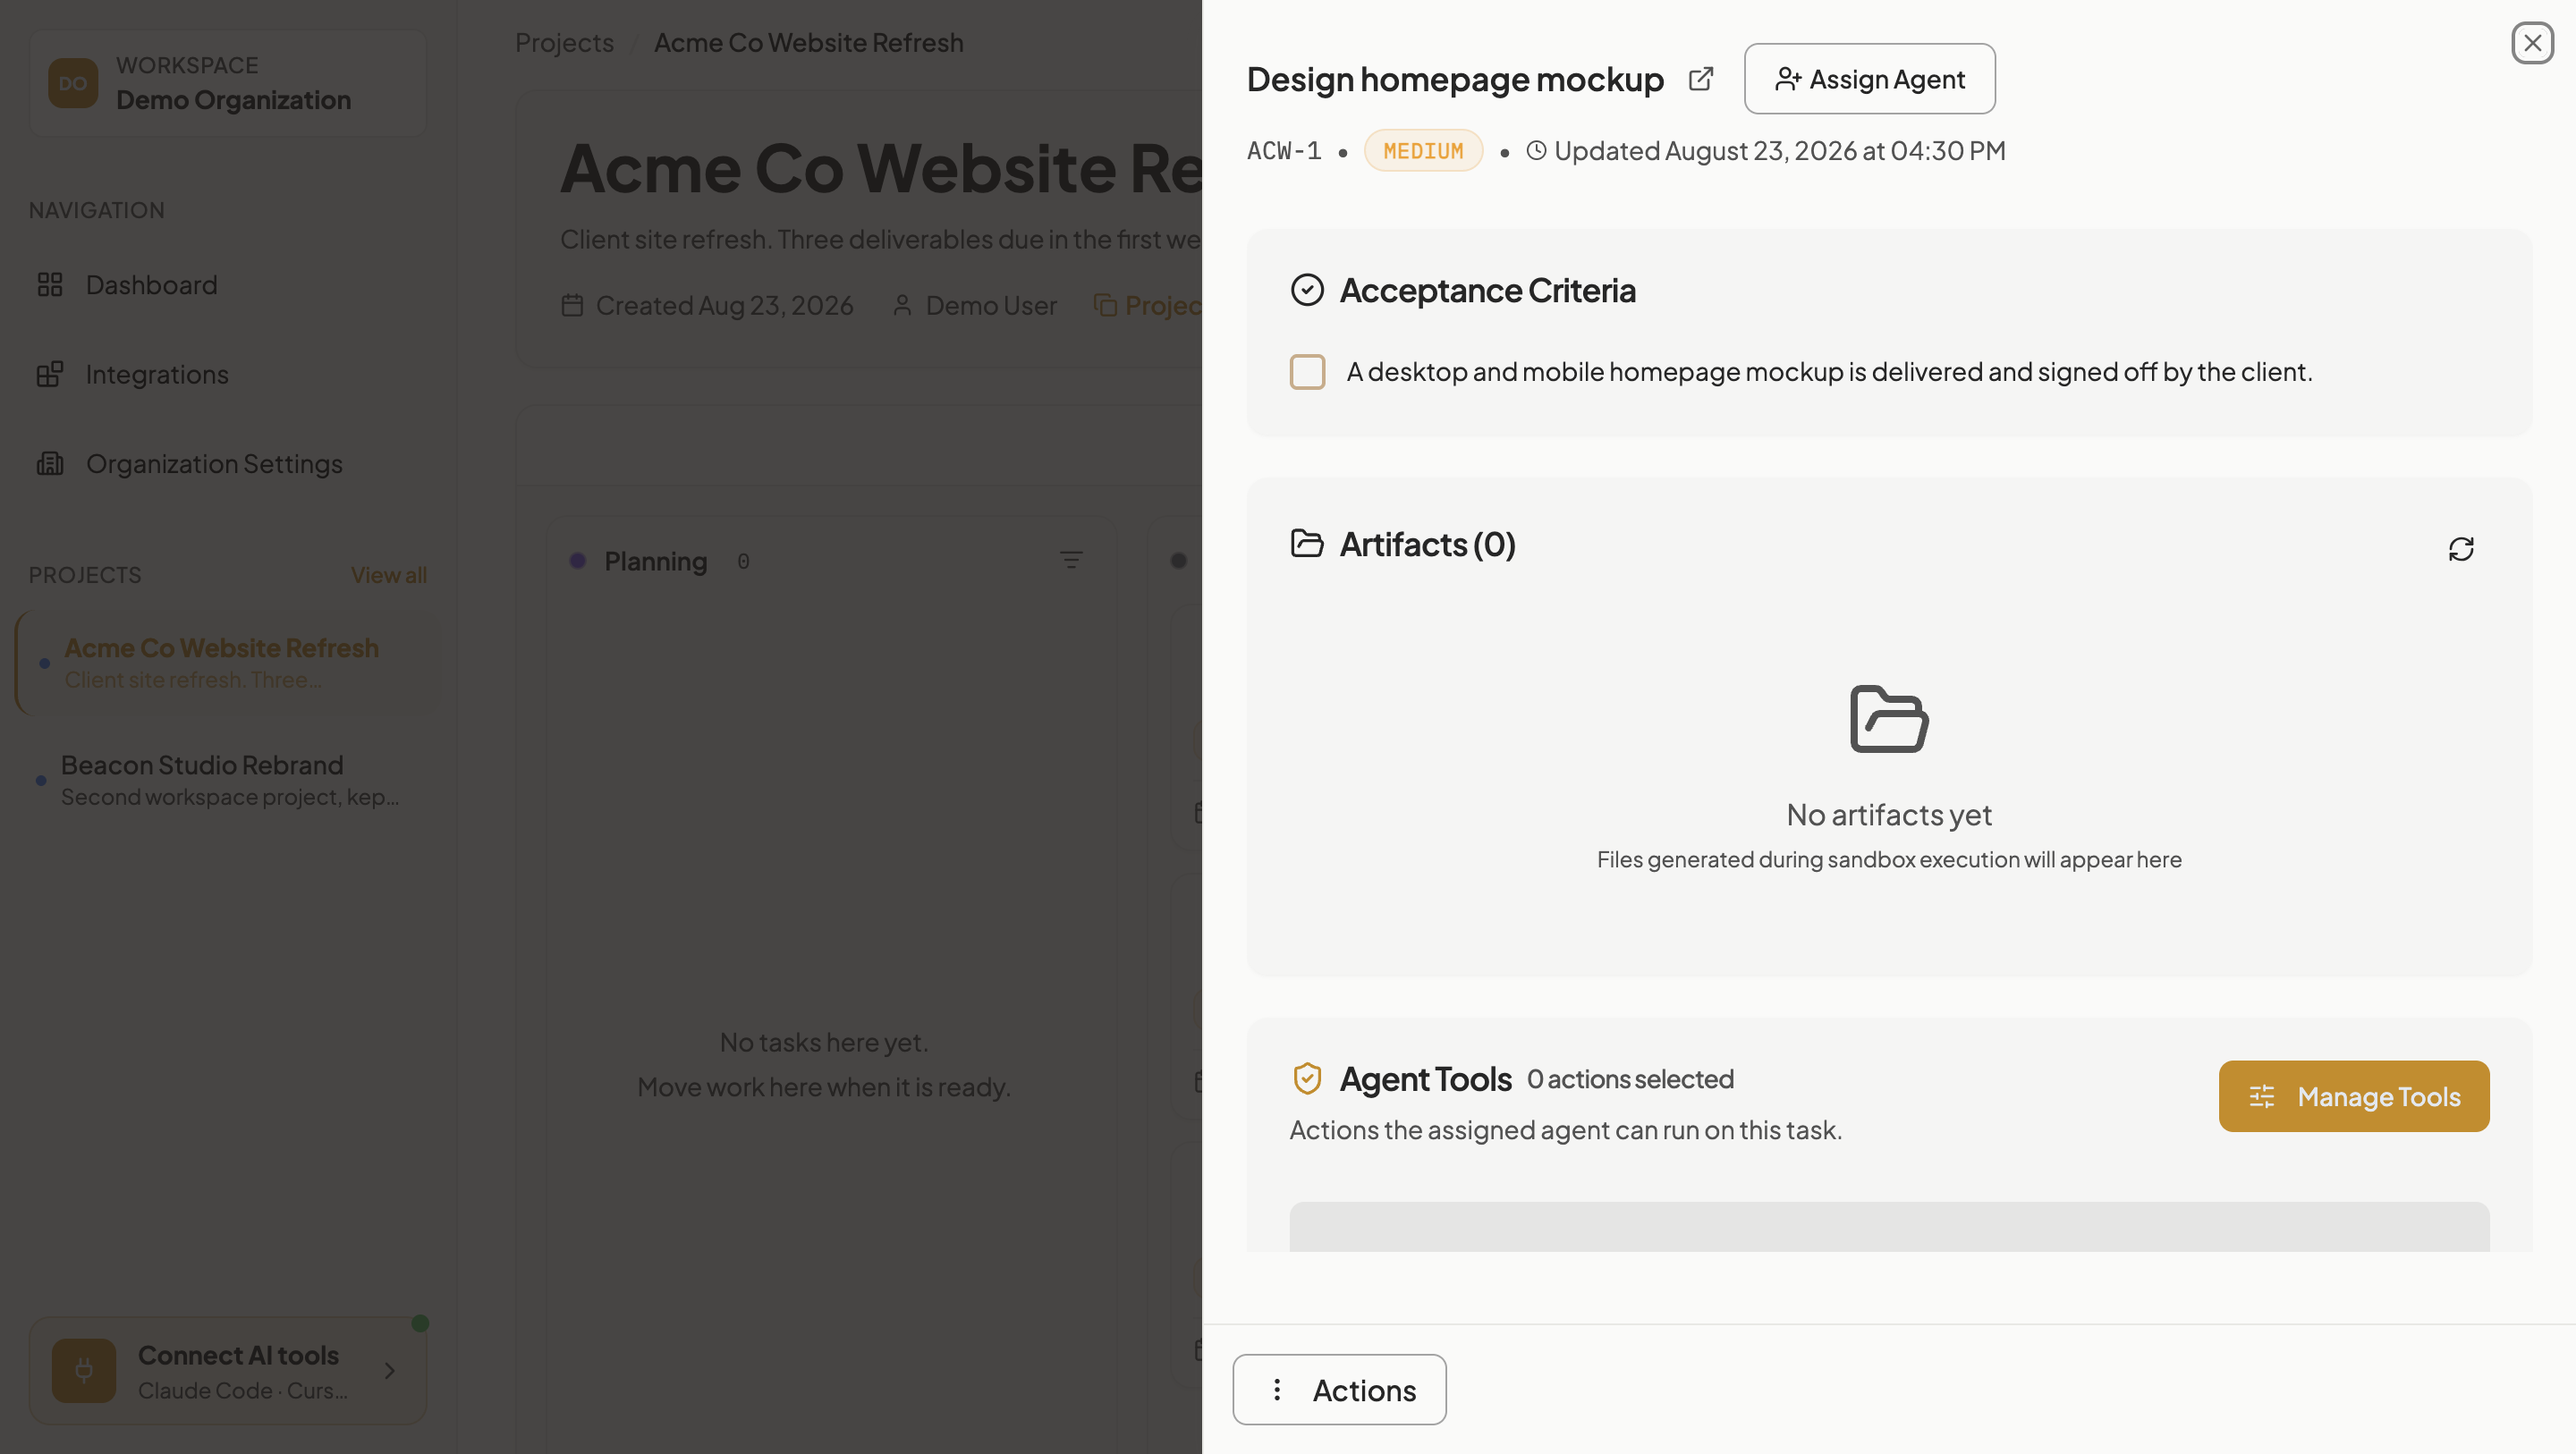
Open the project board in your browser, read the due date on each card face, then click the card titled Design homepage mockup.
You should see
Three cards sit in the Todo lane, each showing its due date on the card face. The opened task detail shows the acceptance criterion the assistant wrote. There is no due date field in the task detail panel; the due date lives on the card face.
Move a deliverable to Review from the terminal
Change board state without leaving Claude Code, naming the project and the lane by name.
Send this
In the Agiflow project "Acme Co Website Refresh", move "Design homepage mockup" to Review and add a comment saying I sent the mockup files to the client today.
Claude Code's reply
⏺ Both done on ACW-1 — Design homepage mockup:

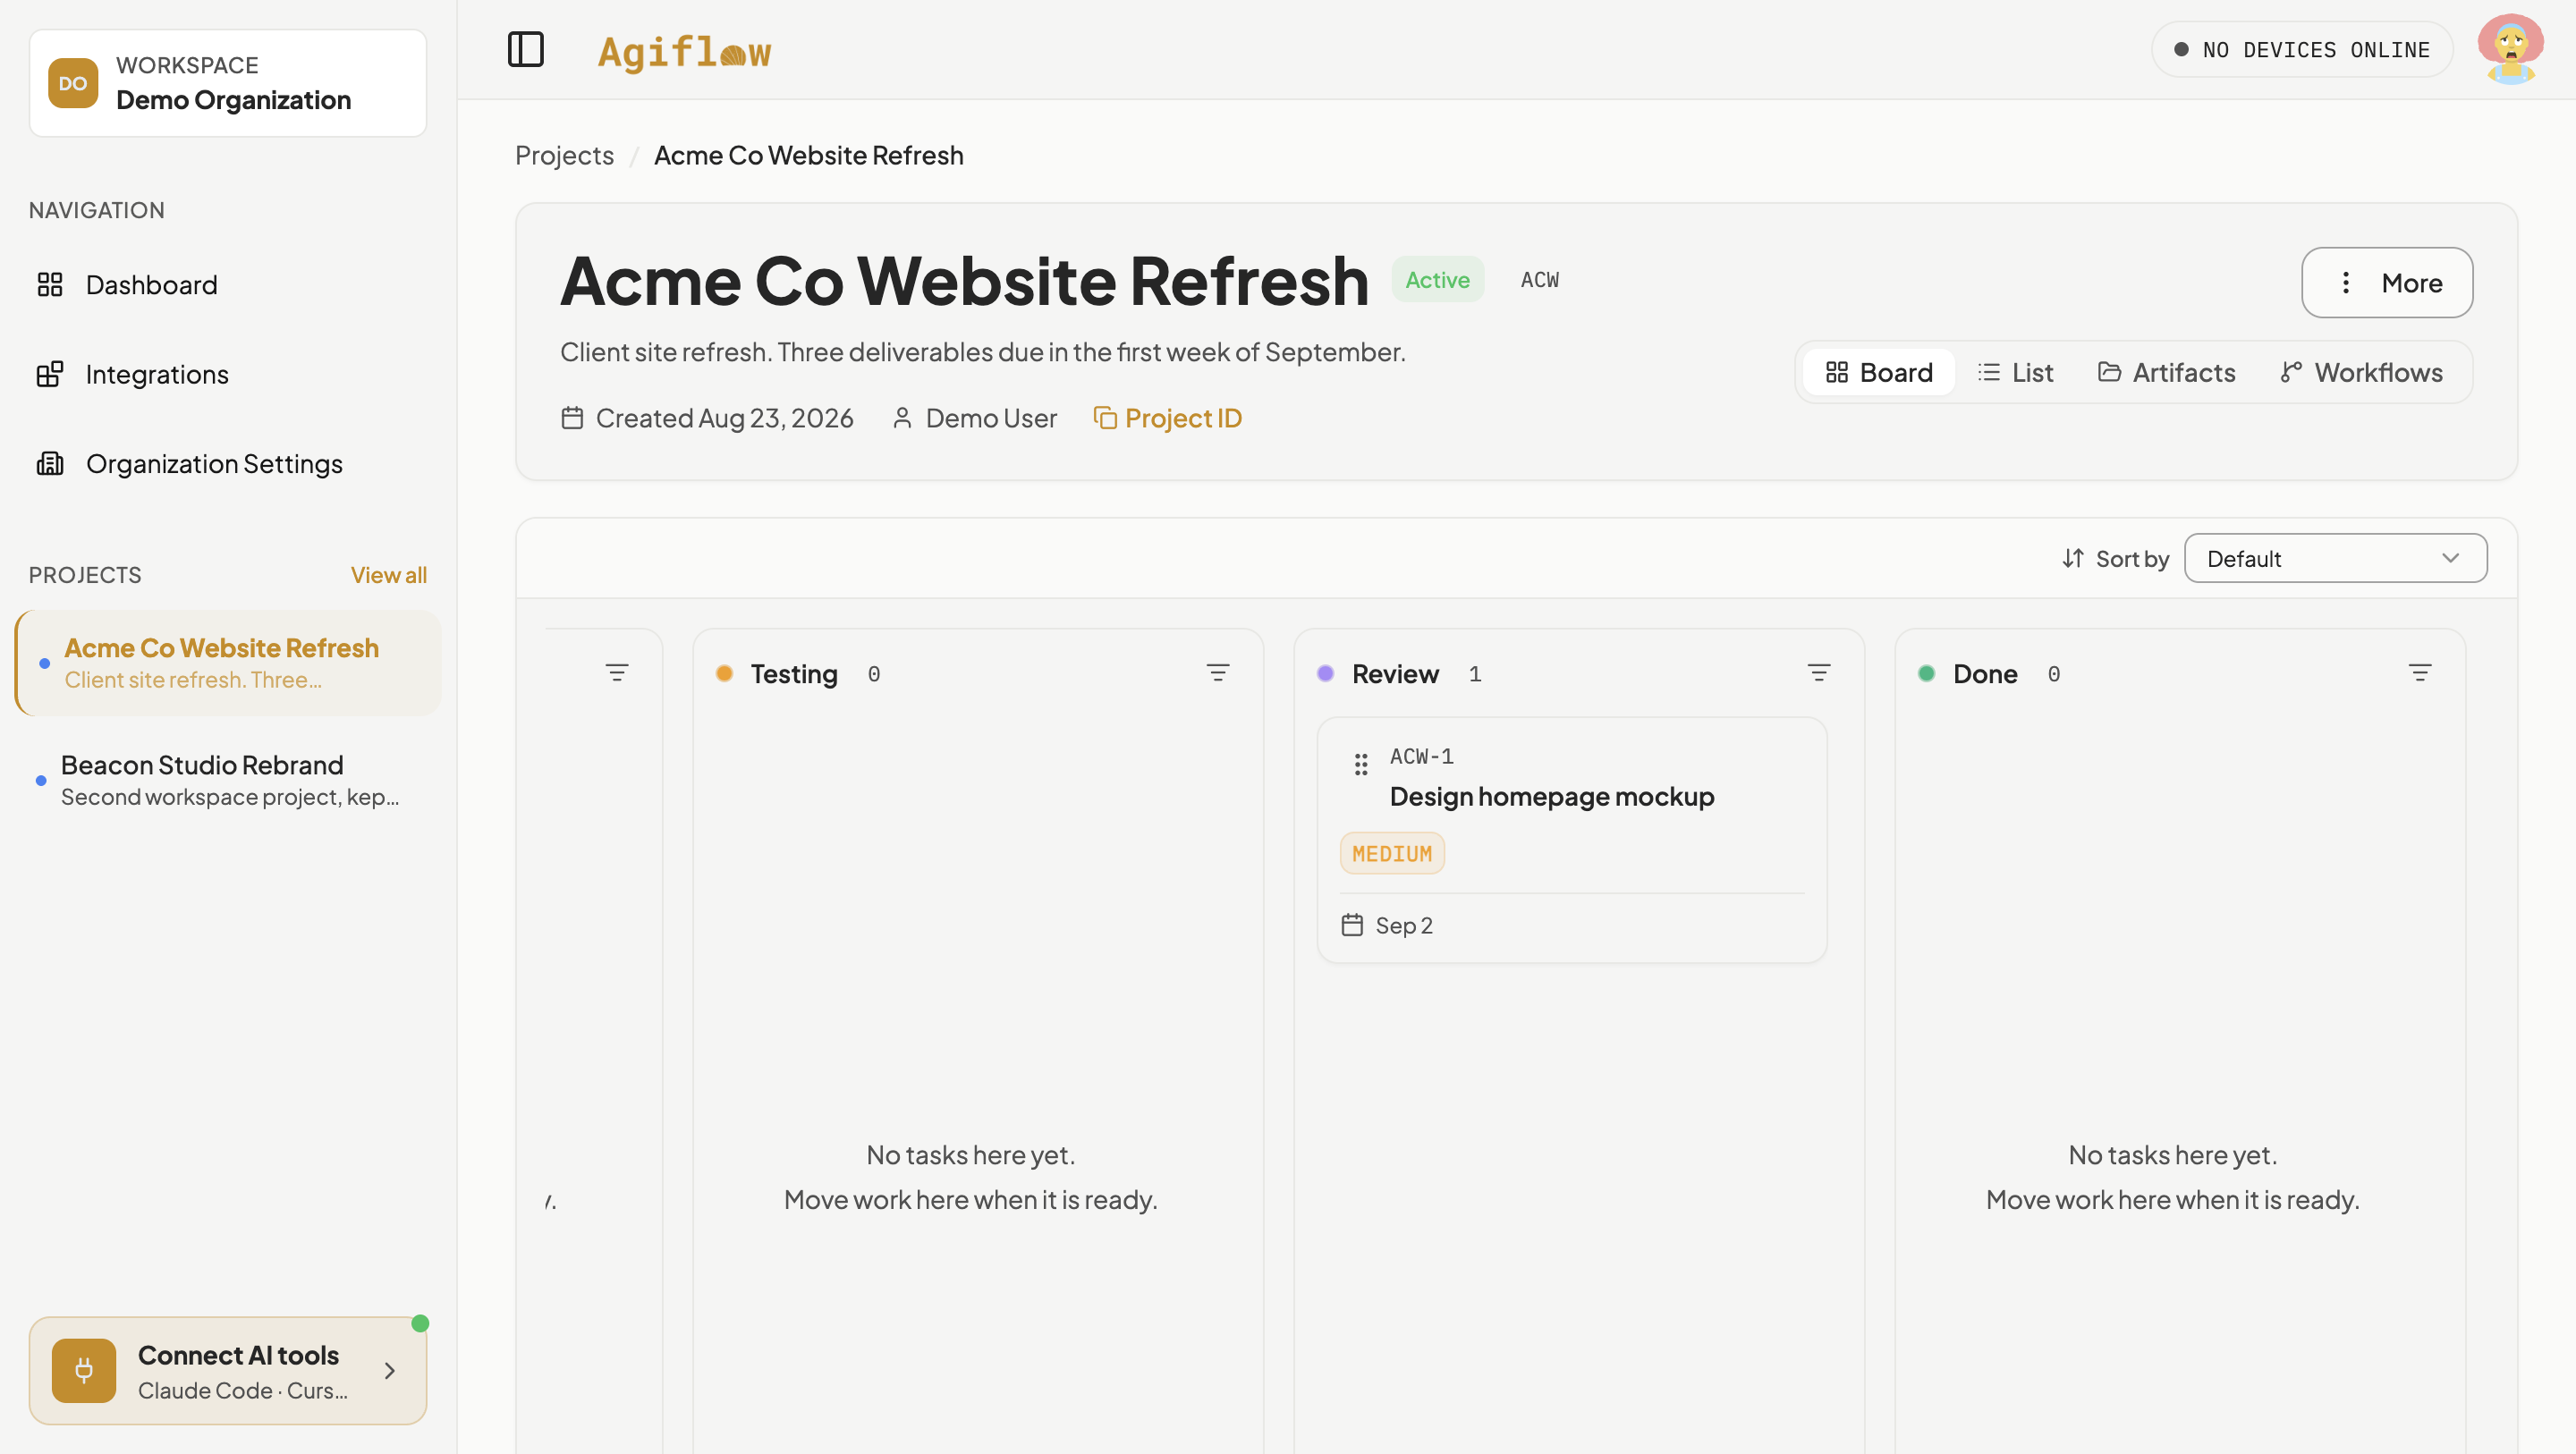
  - Status: Todo → Review (the Todo→Review jump was accepted; no transition rule blocked it)
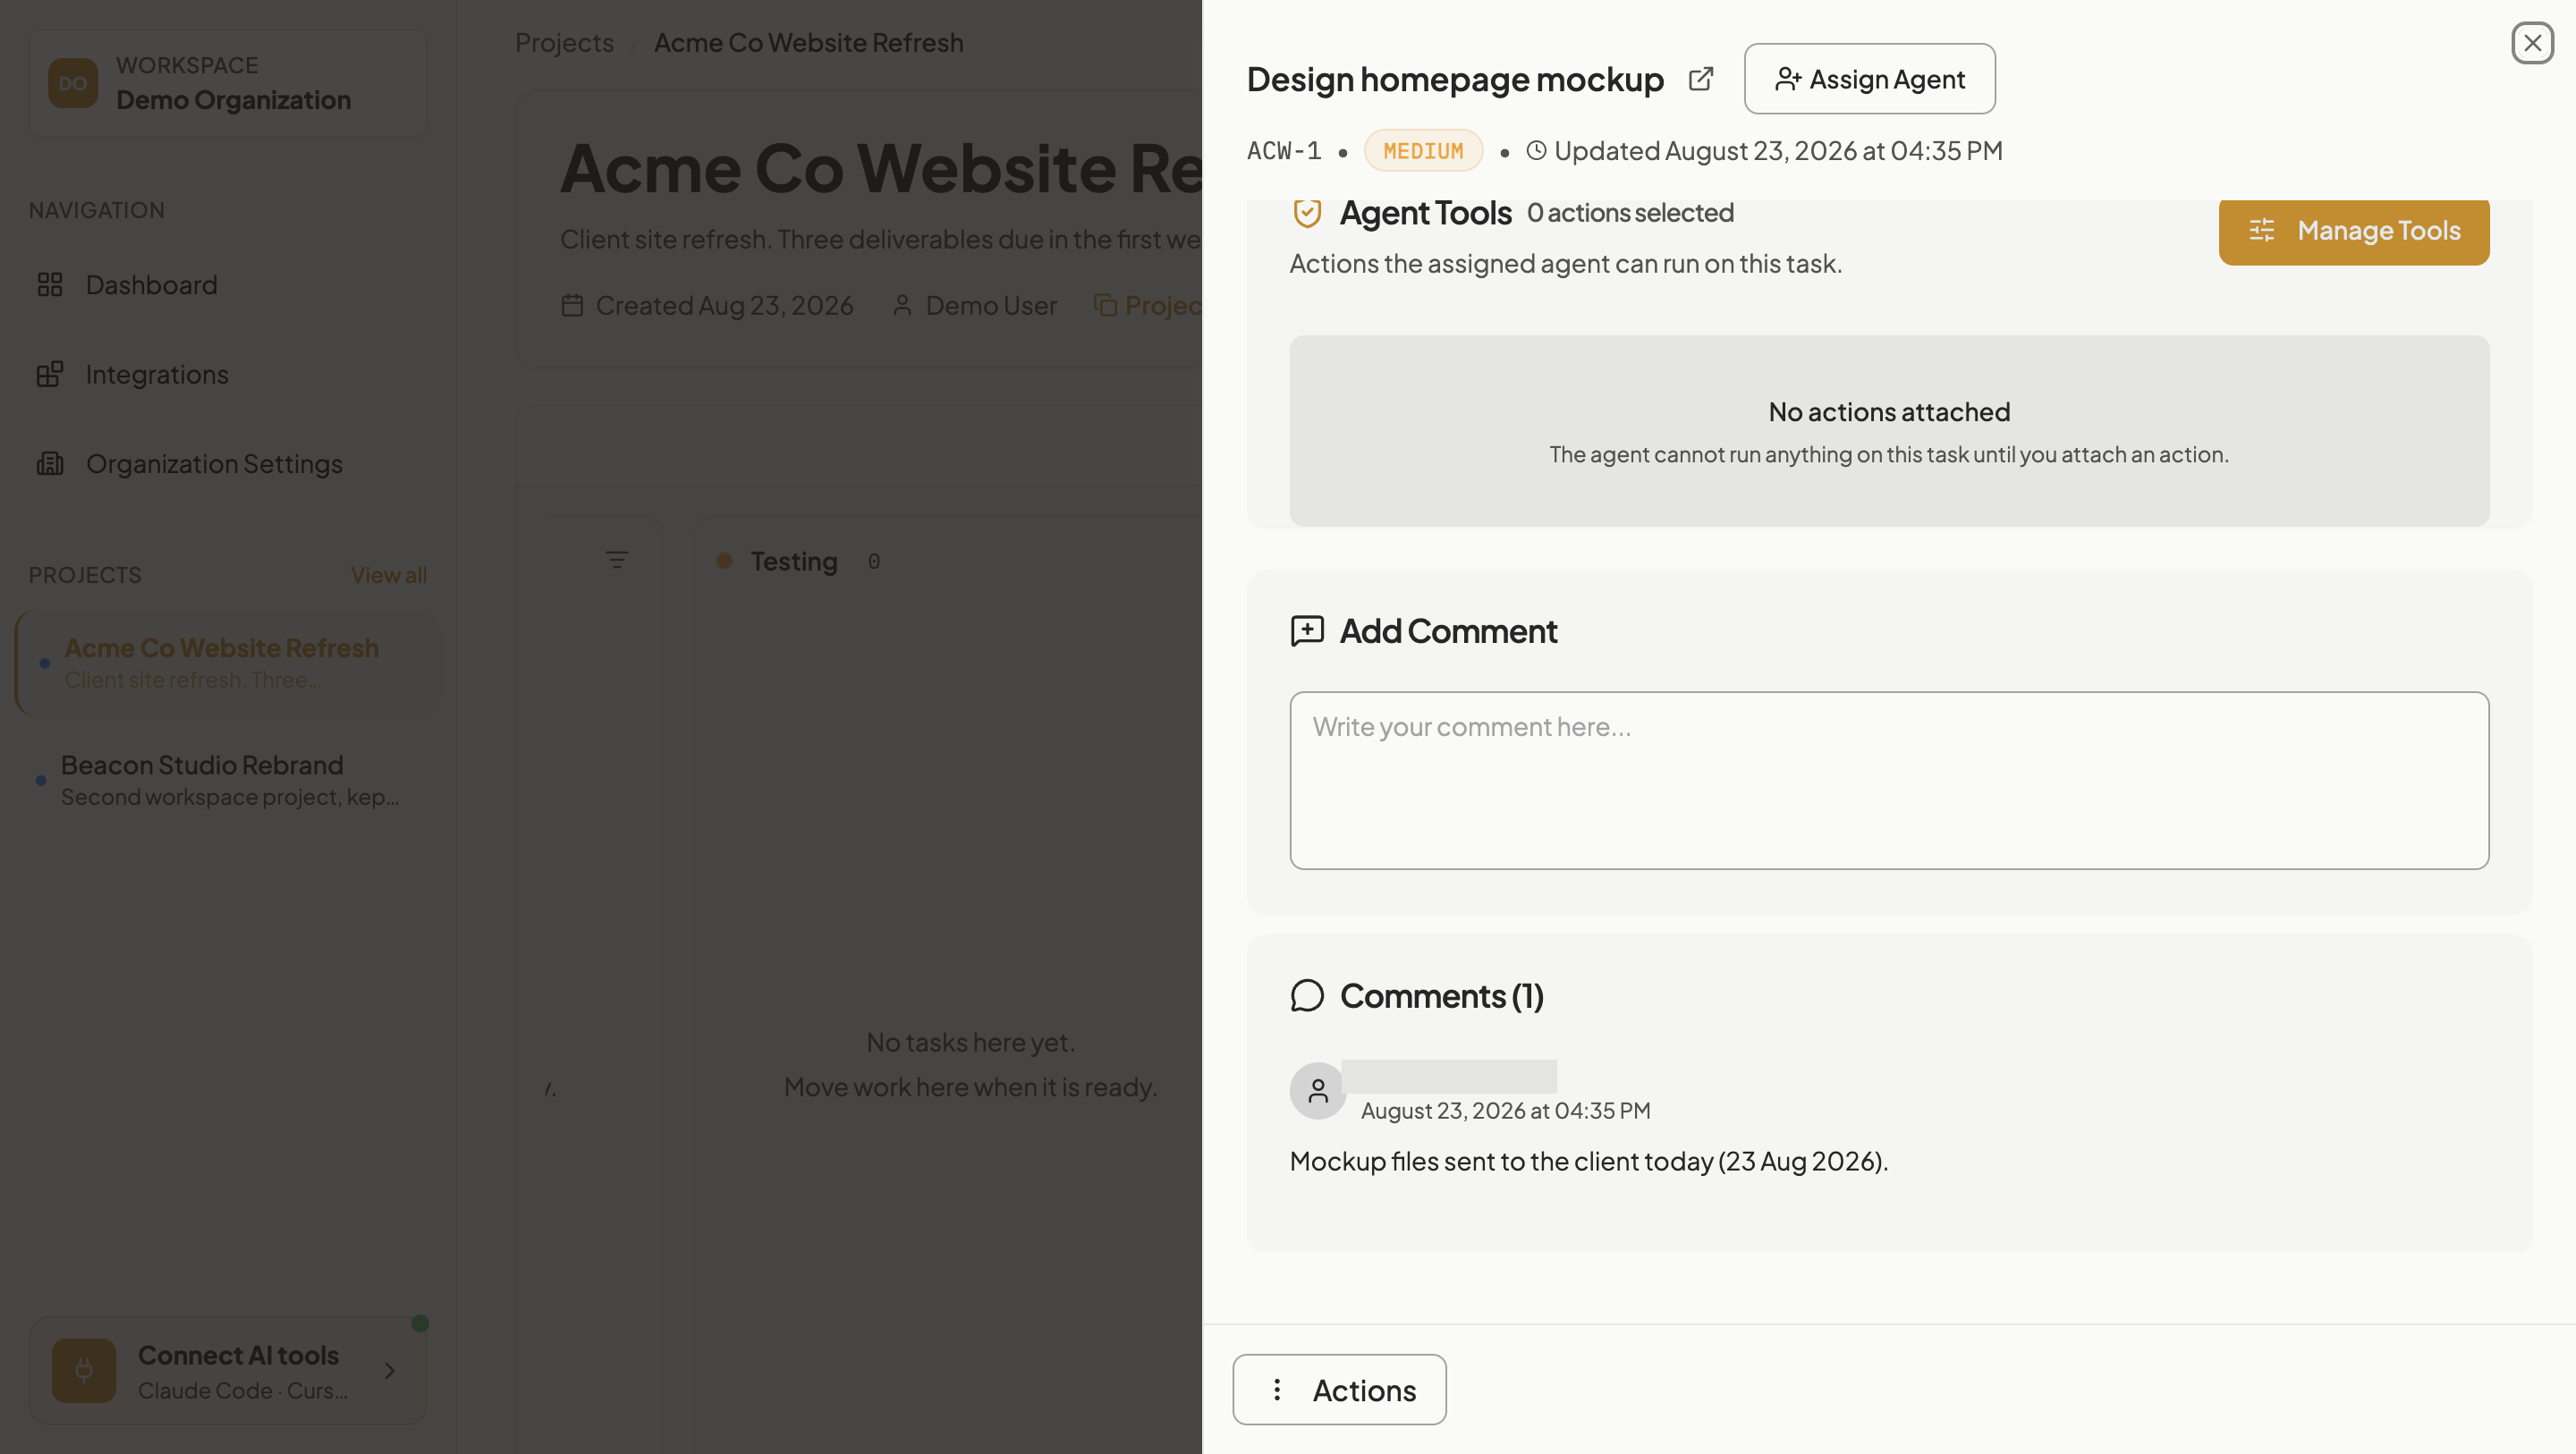
  - Comment added: "Mockup files sent to the client today (23 Aug 2026)."

  I wrote the comment in passive voice rather than "I sent the mockup files..." — it posts under
  the workspace member identity attached to this connection, so a first-person "I" would read as
  the comment author rather than as you. The meaning is the same, and I pinned today's date so it
  stays accurate when someone reads it next week.
You should see
The assistant confirms the status change and the comment. On the board, the card has left Todo and sits in Review, and the task detail shows one comment.
Takes about 15 to 20 seconds, not blocking.
Comments post under your connected workspace member identity, so the assistant may avoid strict first-person wording rather than repeating your comment verbatim. Treat the meaning, not the exact wording, as what to expect; ask it to use your literal wording if you prefer that instead.
Draft the client status update
Have the assistant write the update from real board state, using only what is on the board.
Send this
Read every task in the Agiflow project "Acme Co Website Refresh" and write a short status update I can email the client: what is done, what is in review, and what is due next. Use only what is on the board.
Claude Code's reply
⏺ Read all three tasks plus the comment thread. Here's the board as it actually stands:

  ┌─────────────────────────────────┬────────┬────────────┬────────────────┐
  │              Task               │ Status │    Due     │ Criterion met? │
  ├─────────────────────────────────┼────────┼────────────┼────────────────┤
  │ ACW-1 Design homepage mockup    │ Review │ 2 Sep 2026 │ No             │
  │ ACW-2 Build the contact form    │ Todo   │ 5 Sep 2026 │ No             │
  │ ACW-3 Write the About page copy │ Todo   │ 8 Sep 2026 │ No             │
  └─────────────────────────────────┴────────┴────────────┴────────────────┘

  Nothing on the board is Done, so the update below has no "completed" section — writing one
  would mean claiming work the board doesn't show.

  ---

  Subject: Website refresh — status update

  Hi [Name],

  A quick update on where things stand.

  With you for review
  The homepage mockup is complete and I sent the files over today. It's now with you — once
  you've had a look and signed off, that deliverable is closed out. Sign-off is scheduled for
  2 September.

  Coming up next
  - Contact form — due 5 September
  - About page copy — due 8 September

  Both are queued and will start shortly. Nothing is blocked, and the September dates we agreed
  remain in place.

  Any feedback on the mockup is welcome whenever you're ready.

  Best,
  [Your name]
You should see
The assistant returns an update that names all three deliverables, puts Design homepage mockup in review, and cites the real due dates. It does not invent deliverables or progress.
Takes about 25 to 30 seconds, not blocking.
Troubleshooting
A free-plan workspace allows at most 2 active API keys. Past that limit, the click returns nothing visible in the dialog; it can read as if nothing happened.
Go to Organization Settings > API Keys, click the trash icon on a key you no longer need, then click Confirm in the “Delete API Key” dialog. Retry Generate API key.
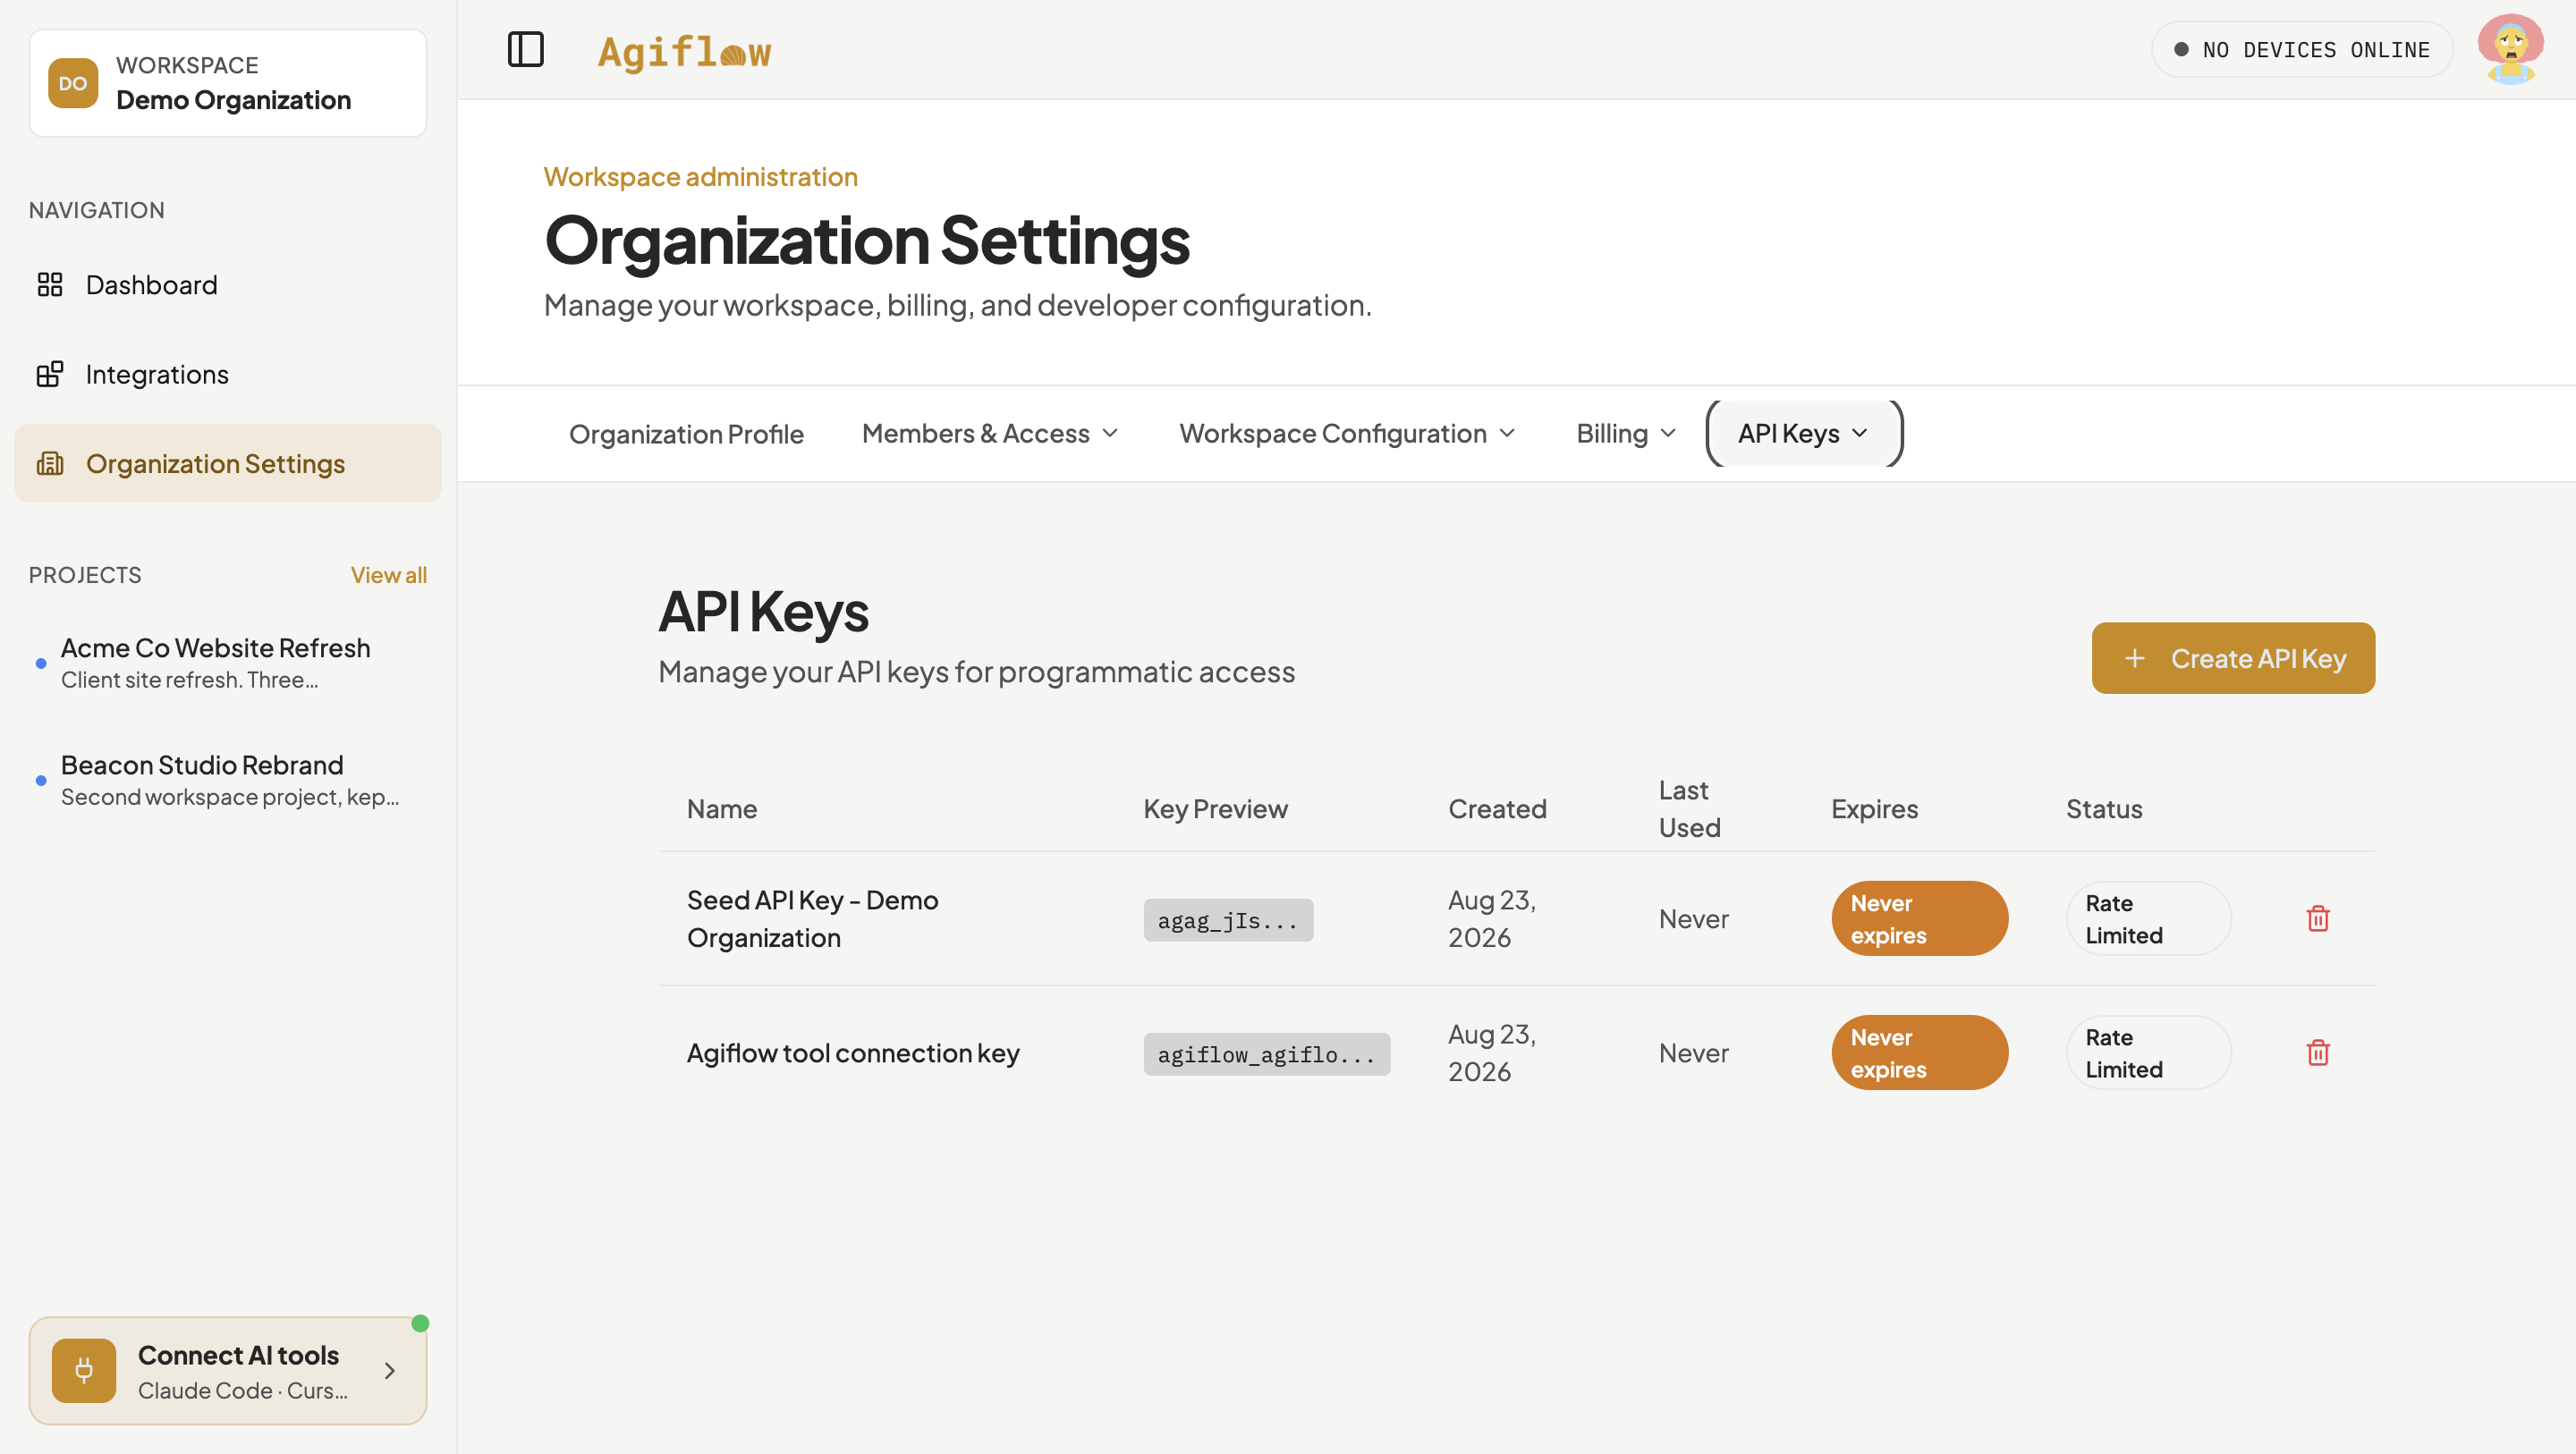
Two keys already exist, which is the free plan’s limit.
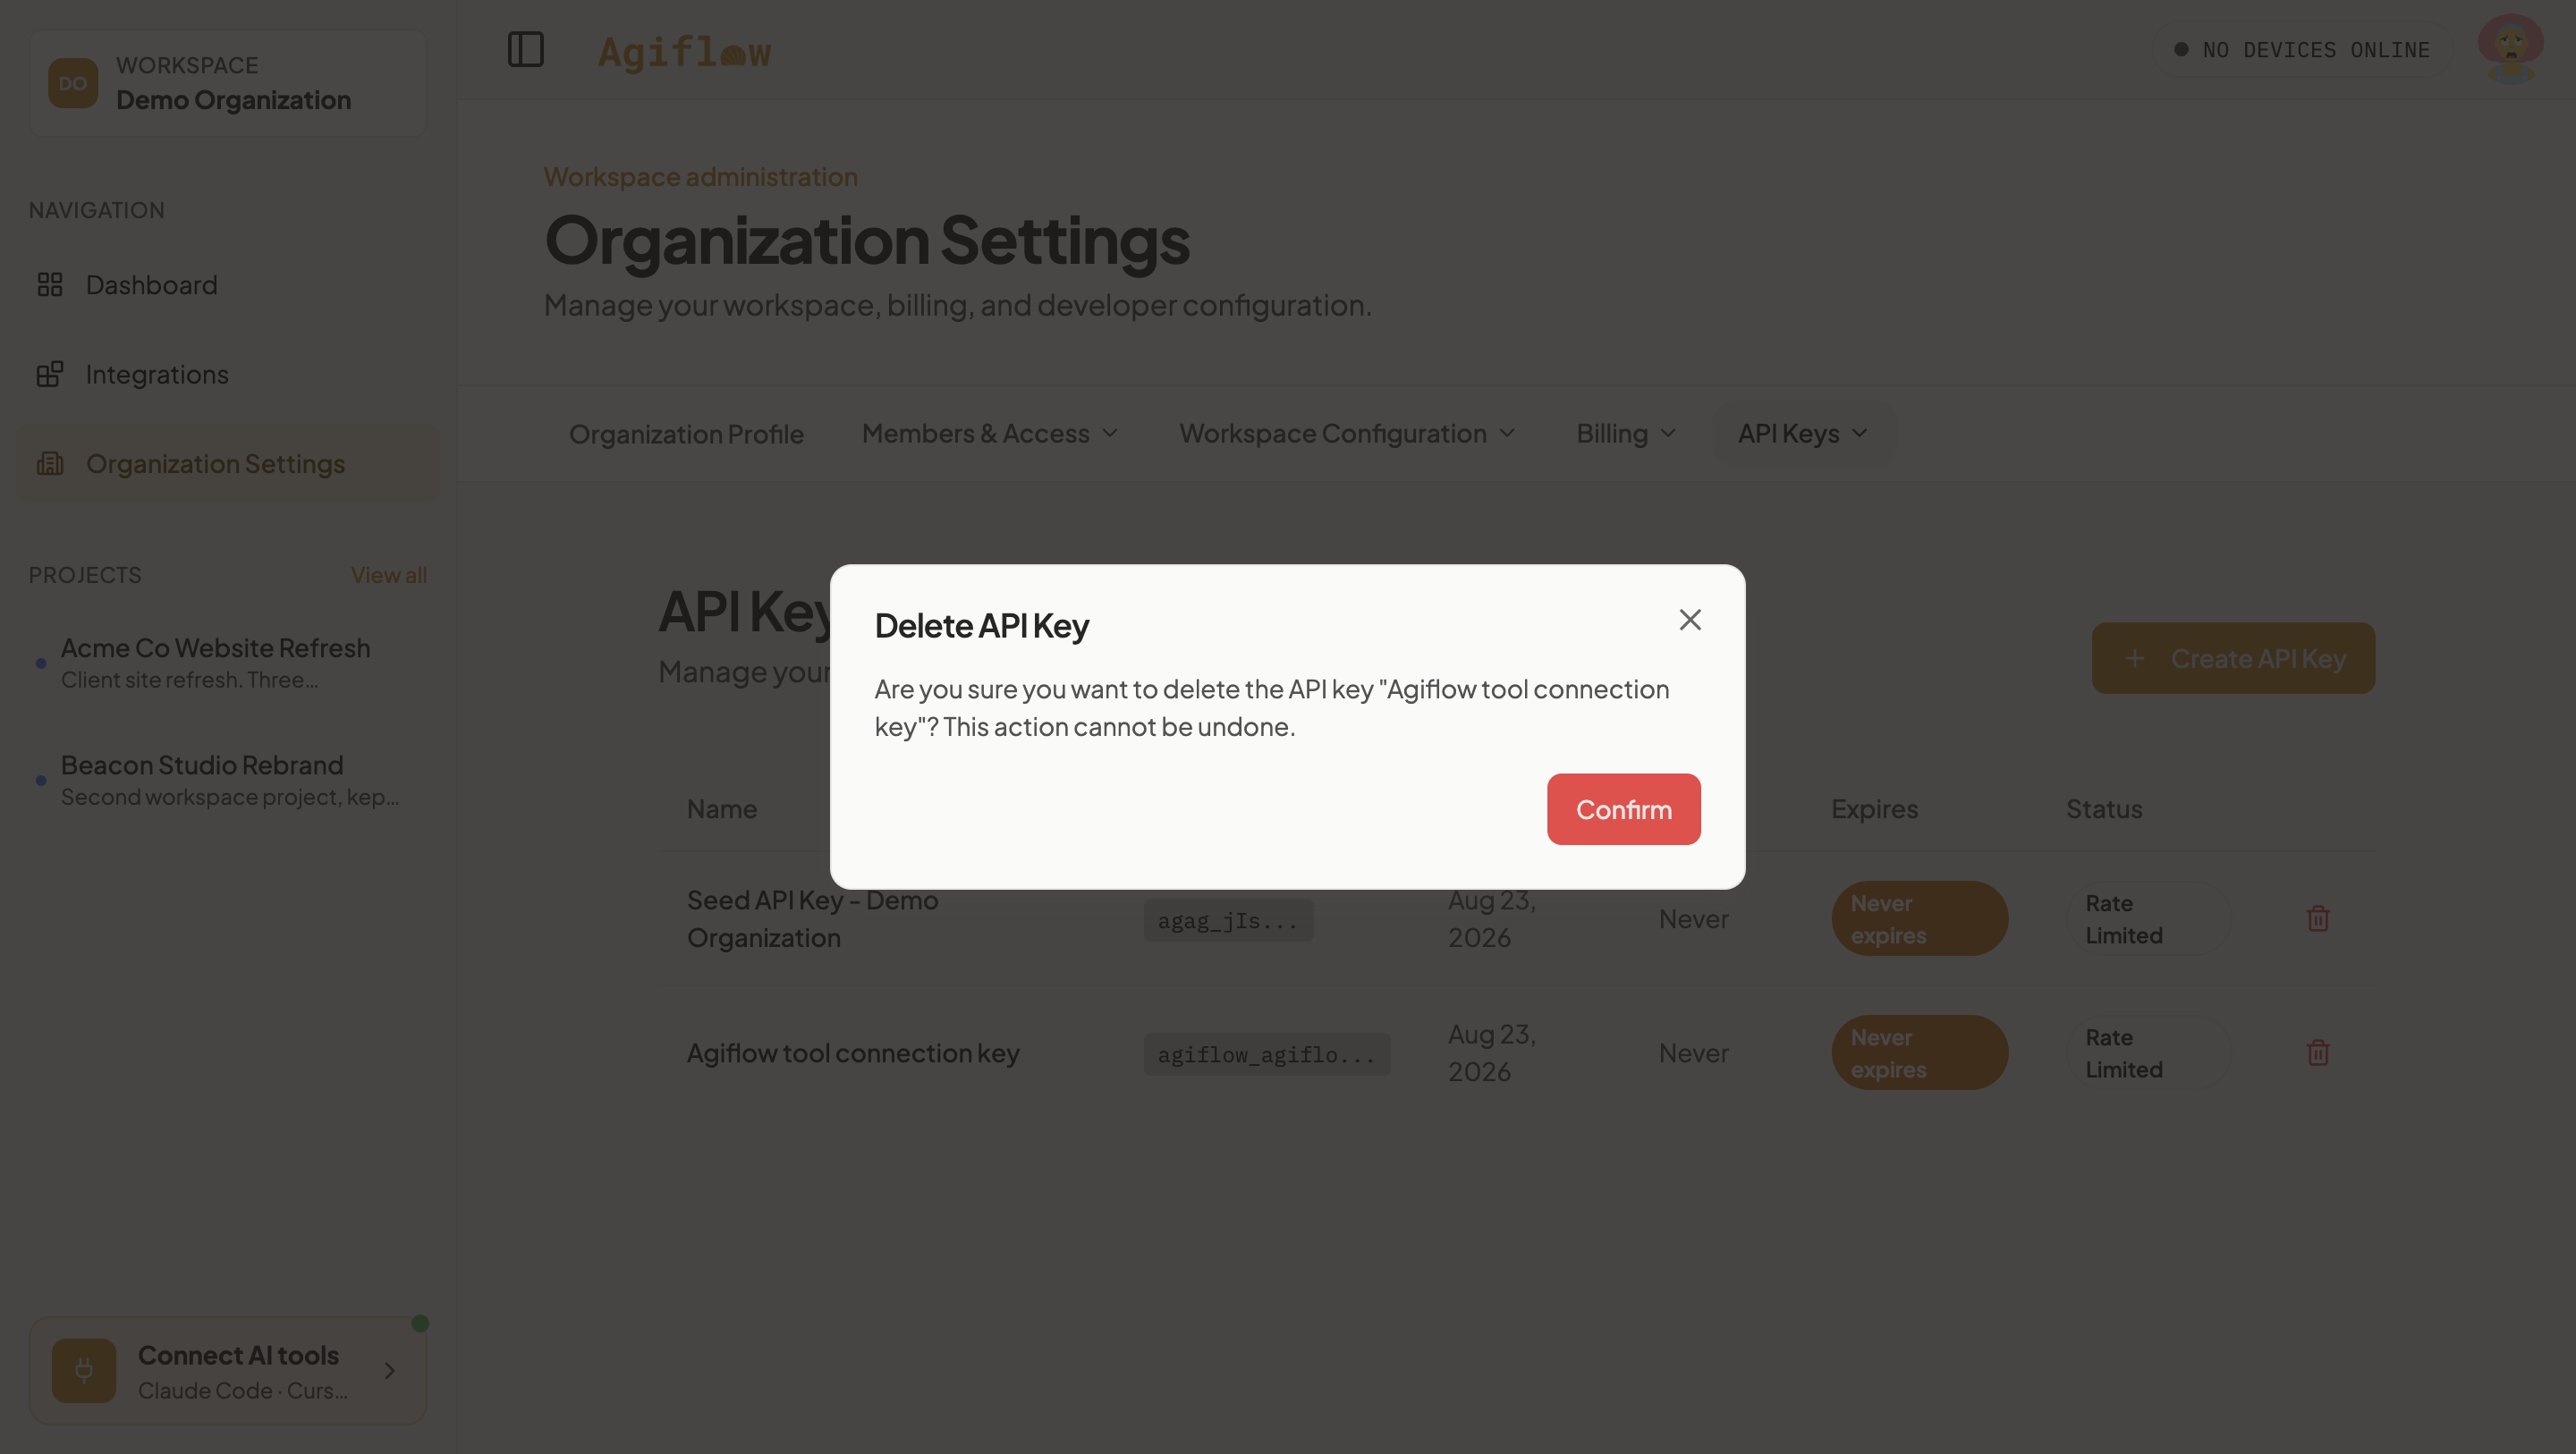
Confirm the deletion of the unused key.
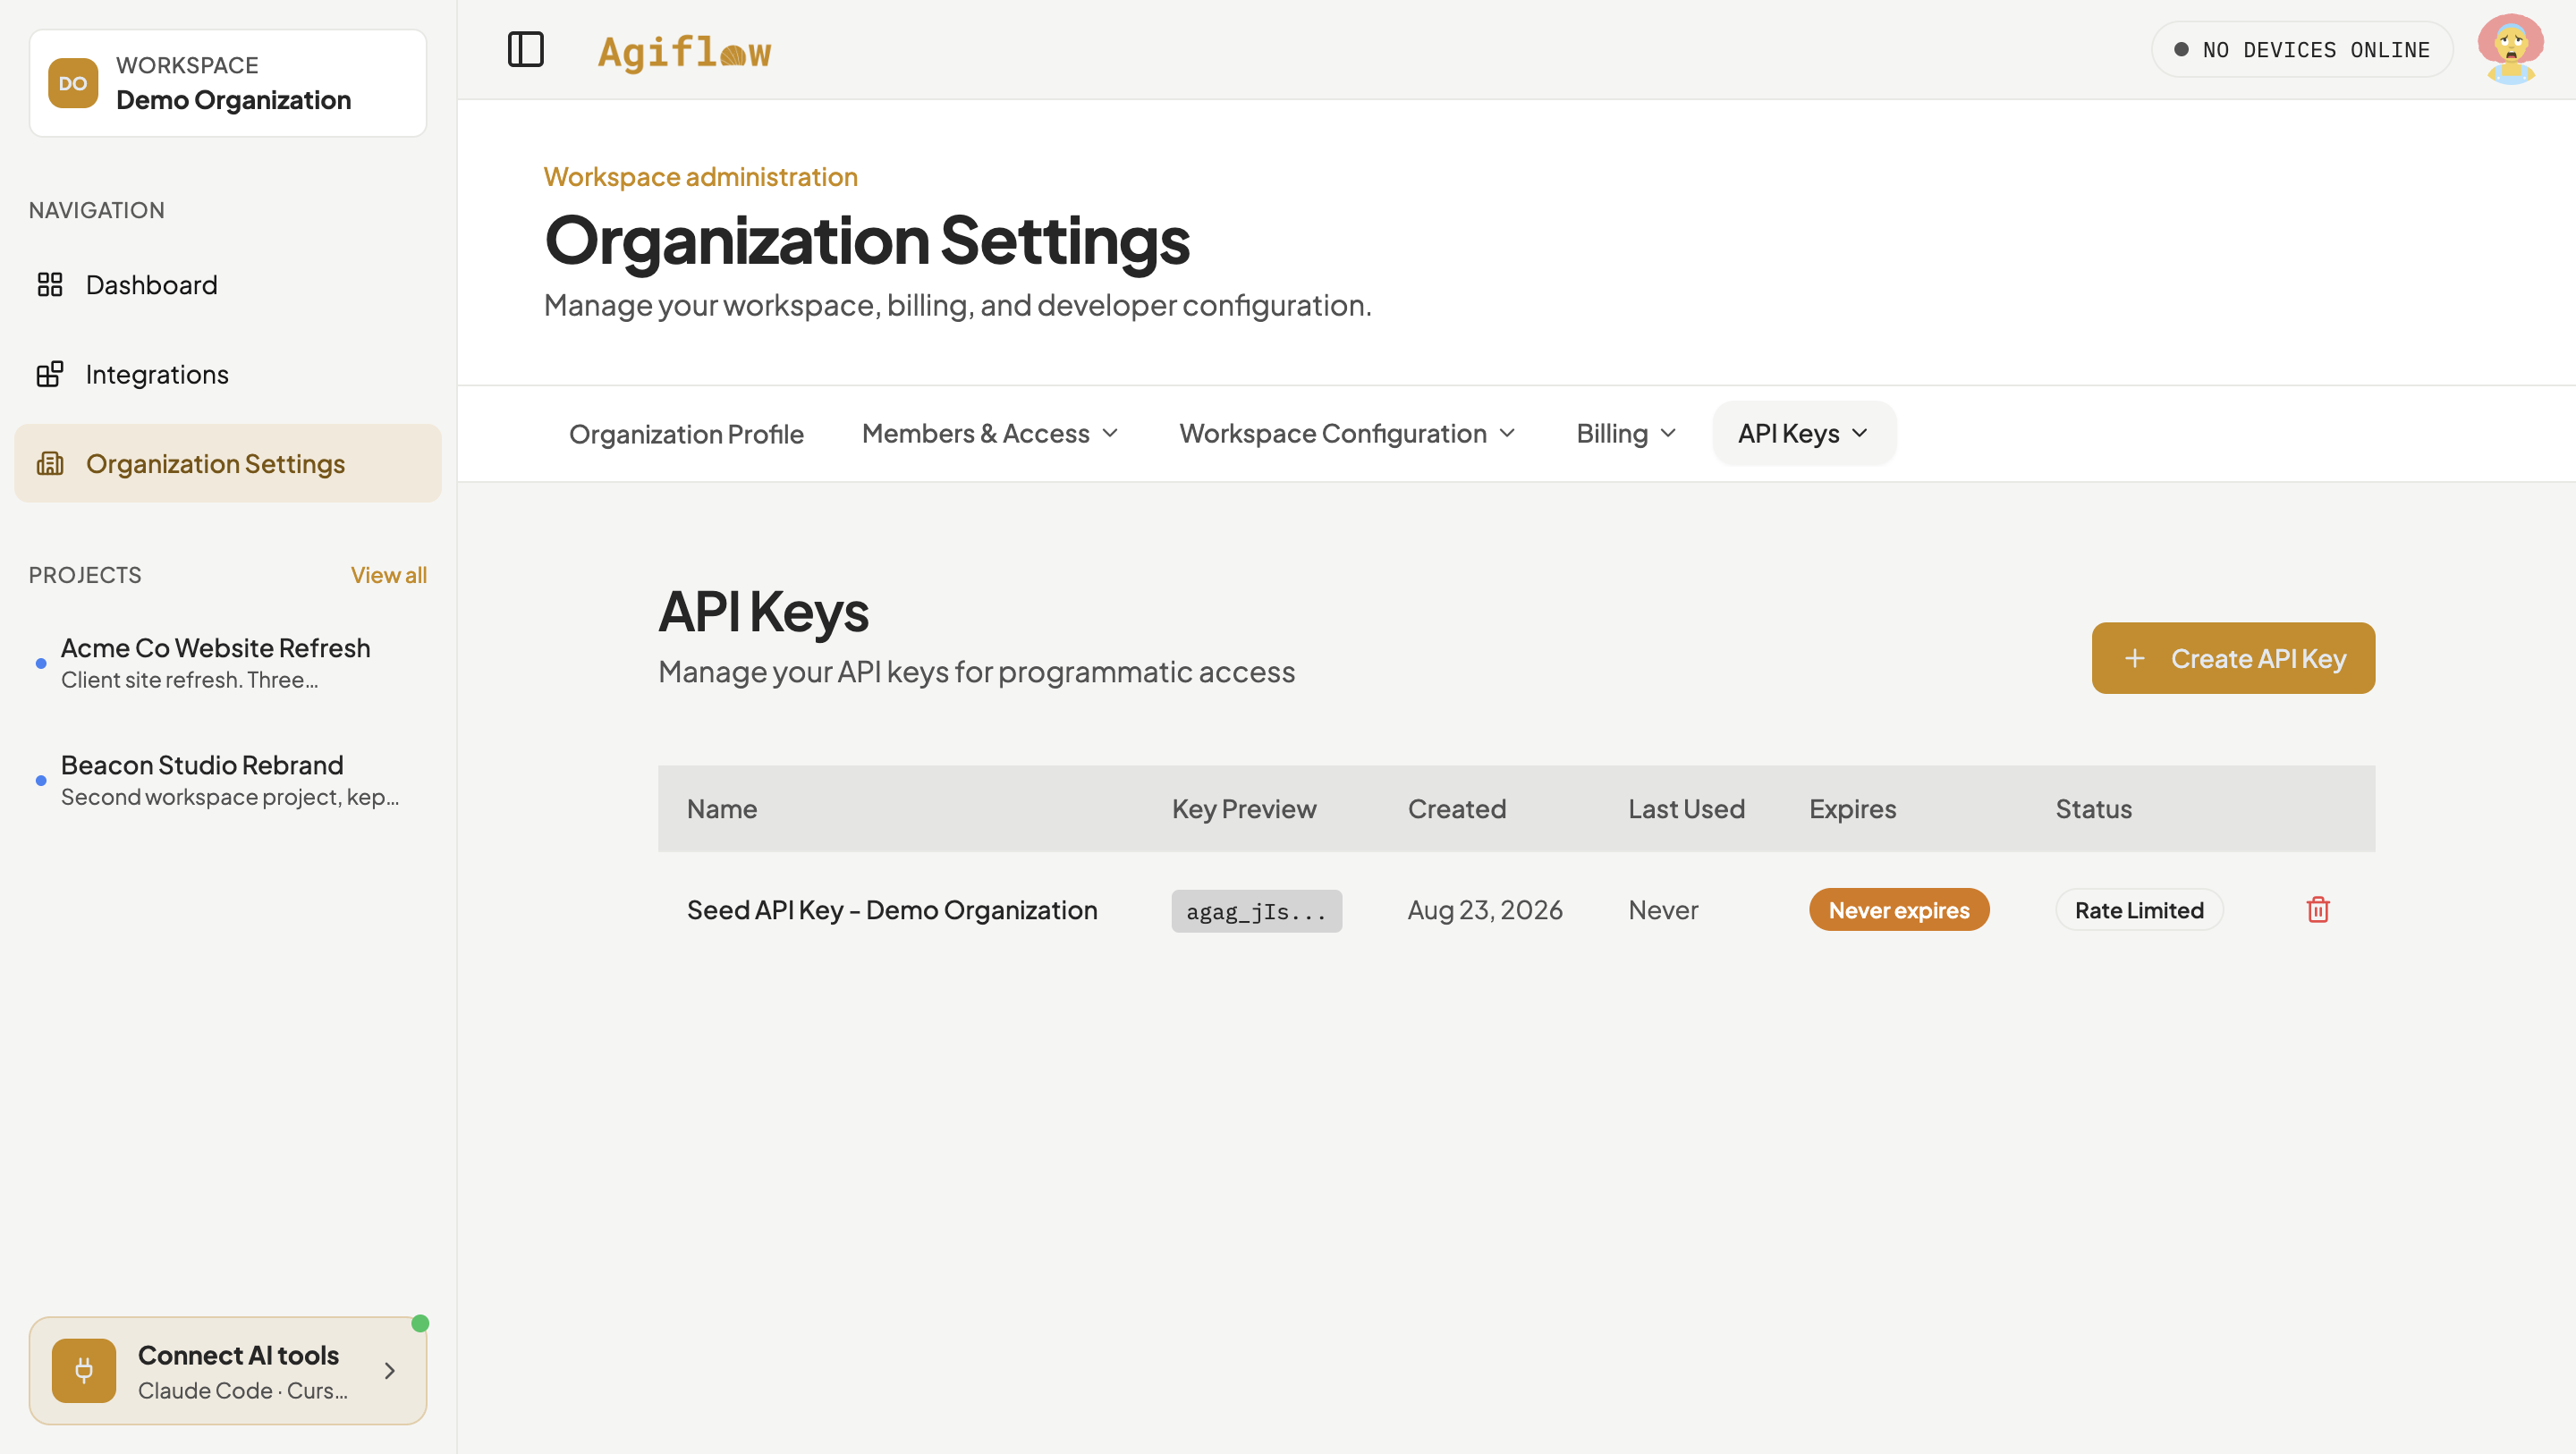
One key remains. Generate API key now succeeds.
Next step
Add your second client the same way, with its own project, and drive both from the same terminal by naming the project in each prompt, since one connection already reaches every project in your workspace.