Invite your team and control project access
Published · Last updated
Agiflow works best when your whole team shares the same board. This guide shows Owners and Admins how to invite members, choose the right role, and use teams to control which projects each person can see.
As of May 2026, invitations are sent by email and must be accepted before the recipient can join. Only Admin and Member roles can be chosen during invitation; Owner status is managed separately.
Before you start
You must be an Owner or Admin in your organization to send invitations. Invitations are sent by email. The recipient accepts the invite to join.
Send an invitation
To invite someone to your organization, open Settings → Invitations, click Invite Member, enter their email, choose Admin or Member, optionally assign a team, and click Send Invitation.
- Open your organization and go to Settings → Invitations.
- Click Invite Member. If this is your first invitation, the button reads Invite Your First Member.
- In the Invite Member dialog, fill in the details:
- Email Address — the colleague's email.
- Role — choose Admin or Member.
- Team (optional) — choose a team, or leave it as No team (org-level only).
- Click Send Invitation.
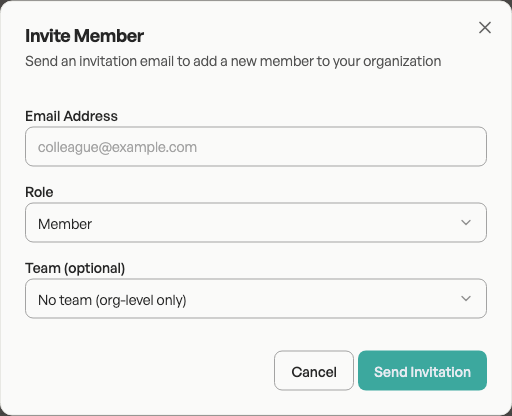
The invitation form offers Admin and Member only. You cannot invite someone as an Owner.
What happens after you invite someone
After you send an invitation, it appears in Pending Invitations with a pending status. You can copy the invitation link or cancel it before it is accepted.
- Copy invitation link — send the link directly if the email is delayed.
- Cancel — remove the invitation before it is accepted.
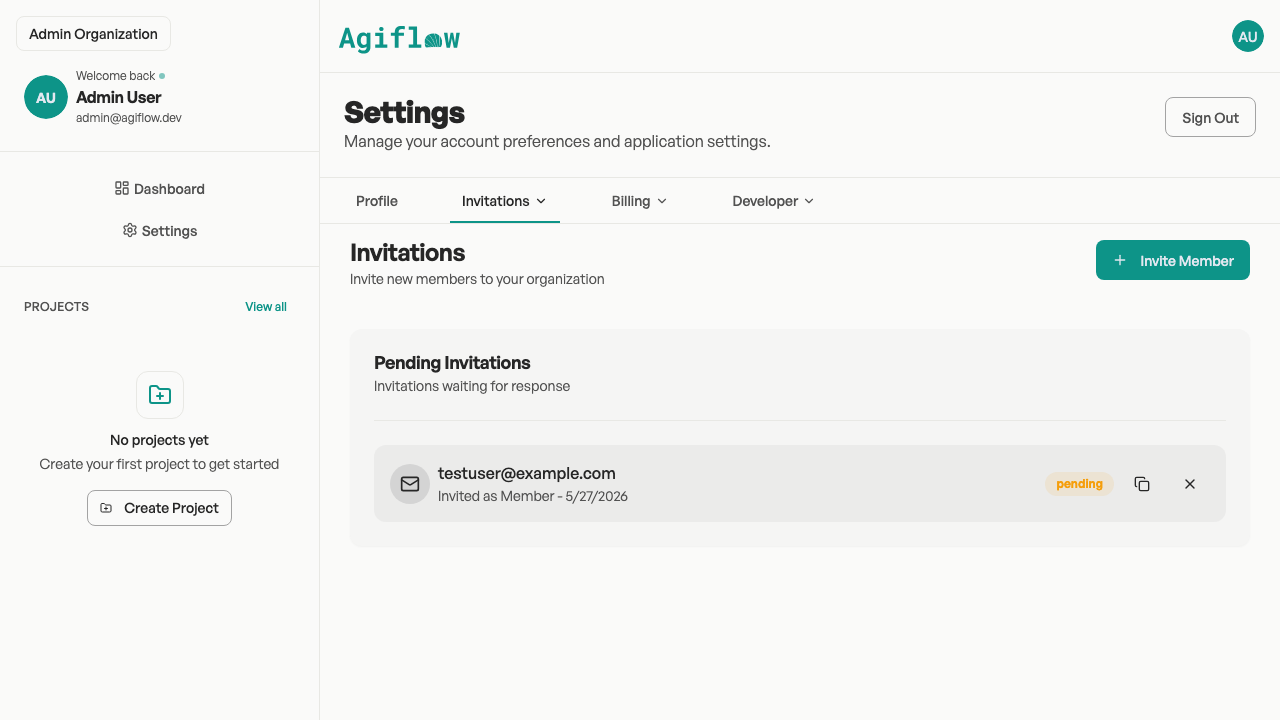
Once the recipient accepts, they appear in the Members list and can start working.
Understand organization roles
Agiflow has three organization roles: Admin manages members and sees all projects, Member works on team-assigned projects only, and Owner has full control including billing and cannot be chosen during invitation.
Admin
Admins can manage members, teams, and invitations. They also see all projects in the organization automatically, even if no team is assigned.
Member
Members can work on projects and tasks, but they cannot manage organization settings or invite others. A Member only sees projects that are assigned to their teams.
Owner
Owner exists as an organization role, but it cannot be chosen during invitation. Owner status is managed separately from the invite flow. Owners have the same full access as Admins, plus billing and organization-level controls.
Use teams to control project access
Teams restrict which projects a Member can see. Assign projects to teams in Settings → Teams so only the right people can access each project.
- Members only see projects assigned to their teams.
- Admins and Owners see all projects without team restrictions.
To give a team access to a project:
- Go to Settings → Teams.
- Find the team and click Members.
- In the Team Projects section, click Assign.
- Select a project and click Assign Project.
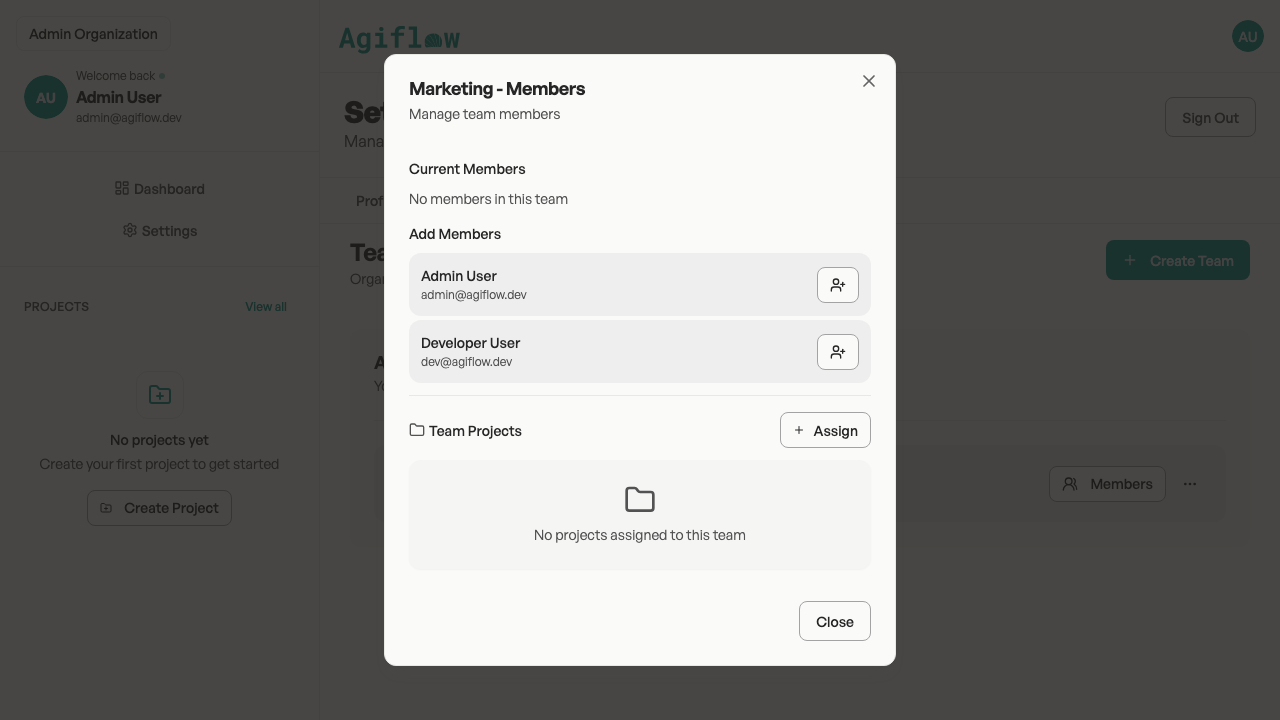
If you invite someone directly into a team, they automatically inherit access to that team's projects.
Manage existing members
To update a member's access, go to Settings → Members, use the role selector to switch between Admin and Member, or remove them from the organization entirely.
- Go to Settings → Members.
- To change a member's role, use the role selector next to their name. You can switch between Admin and Member.
- To remove a member, open the actions menu and choose Remove Member.
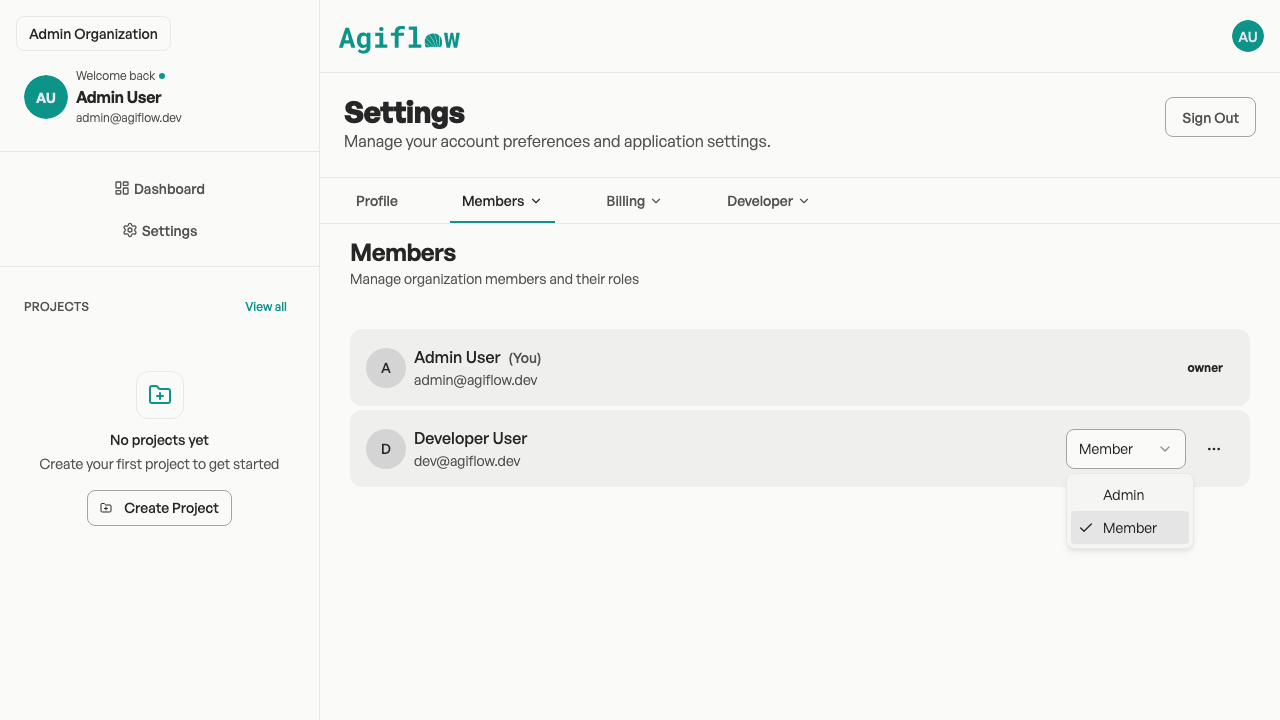
You cannot change someone's role to Owner through the member management page. Owner transfers are handled separately.
Related guides
Learn more about how Agiflow organizes work and how your AI assistant can help.